Blog
Notes on building and running web apps
Practical write-ups on web development, DevOps and Linux administration, from real projects.
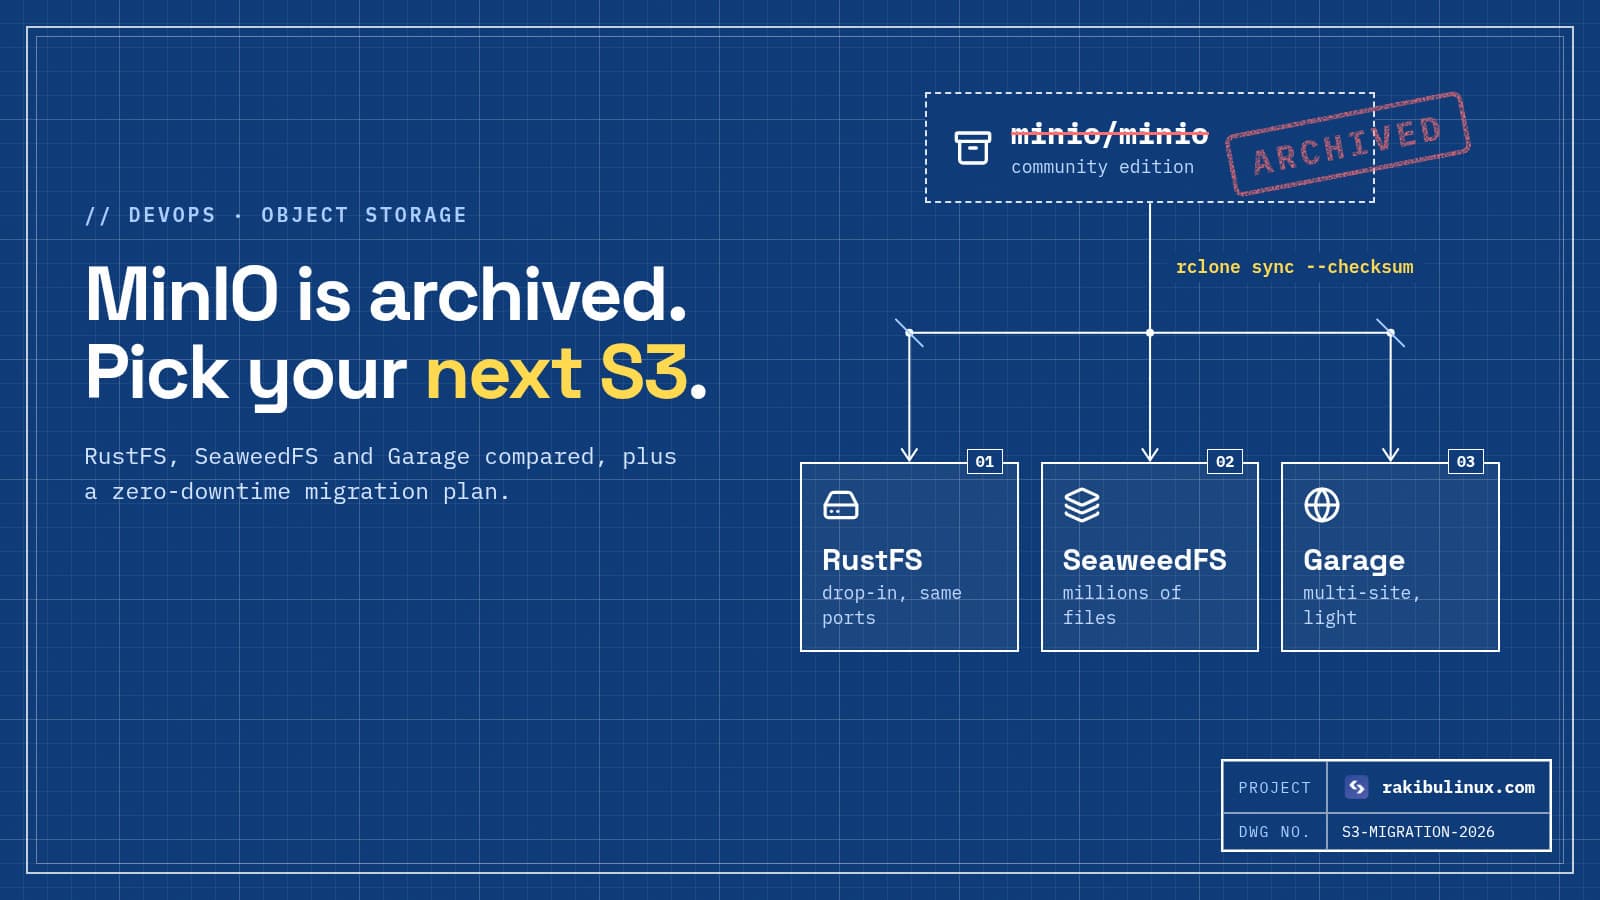
MinIO Is Archived: Self-Hosted S3 Alternatives in 2026
MinIO's open-source repo is archived. For self-hosted S3 in 2026, use RustFS as a drop-in, SeaweedFS for proven scale, or Garage for small multi-site clusters. For years, MinIO was the answer to "how do I run S3 on my own server?" That is no longer true. Over 2025 the company removed most of the web console from the community edition, stopped publishing free binaries and Docker images, and moved the open-source project into maintenance mode. In April 2026 the GitHub repository was archived. If your app still stores uploads, backups or build artifacts in a community MinIO instance, you are running unmaintained storage software, and it is time to plan a move. I went through this migration myself. The uploads for this website (blog covers, project screenshots, chat attachments) used to live on local disk and in MinIO-style storage. Today they live in RustFS , with a local-disk fallback for older files. This guide covers what I learned: which alternatives are worth your time, how to choose, and how to migrate without breaking a single image URL. Key takeaways MinIO community edition is no longer a safe default. No new security fixes means every exposed instance becomes riskier over time. RustFS is the closest MinIO look-alike: same single-binary model, same ports (9000 API, 9001 console), Apache 2.0 license. SeaweedFS is the mature, battle-tested choice when you have lots of files or need to grow to many servers. Garage is great for small clusters spread across locations, but implements only the core S3 API. Migration is mostly boring if your app talks plain S3: copy buckets with rclone , switch the endpoint, keep the same object keys. Why the MinIO change matters for your business Object storage is rarely the exciting part of a product, which is exactly why it gets forgotten. It quietly holds customer uploads, invoices, database backups and media. When the software underneath stops getting patches, three things happen: Security debt grows. Any vulnerability found after the archive date stays open in the community build. Docker images go stale. If you pull minio/minio:latest in CI, you may already be pinned to an old build without noticing. Hiring and support get harder. New engineers will expect a maintained tool, and documentation will slowly drift away from the version you run. The good news: S3 is a protocol, not a product. Your application code almost never needs to change. You swap the server behind the endpoint. The best self-hosted S3 alternatives in 2026 1. RustFS: the drop-in replacement RustFS is written in Rust, licensed under Apache 2.0, and openly aims to fill the space MinIO left. It ships as a single binary or Docker image, exposes the S3 API on port 9000 and a web console on port 9001, and the console will feel familiar to anyone who used the old MinIO UI. docker run -d --name rustfs \ -p 127.0.0.1:9000:9000 -p 127.0.0.1:9001:9001 \ -e RUSTFS_ACCESS_KEY=change-me \ -e RUSTFS_SECRET_KEY=a-long-random-secret \ -v /srv/rustfs/data:/data \ -v /srv/rustfs/logs:/logs \ --restart unless-stopped \ rustfs/rustfs:latest Notice the 127.0.0.1 bindings. Docker publishes ports straight through iptables and bypasses UFW, so I never expose storage ports publicly. Put Nginx in front with TLS instead (for example s3.yourdomain.com ), and never keep the default rustfsadmin credentials. Choose RustFS when: you ran a single MinIO node, you want the shortest migration, and you like having a web console. Be careful: it is a younger project, so pin a version tag in production and test upgrades on staging first. 2. SeaweedFS: proven at scale SeaweedFS has been in development for over a decade. It is built for very large numbers of files, stores small objects efficiently, and offers an S3 gateway on top of its own filer. It is Apache 2.0 licensed and has a long production track record. Choose SeaweedFS when: you store millions of files, you expect to grow beyond one server, or you need features like tiering to cloud storage. Trade-off: more moving parts (master, volume, filer, S3 gateway) and a steeper learning curve than a single binary. 3. Garage: lightweight and geo-distributed Garage was designed by the Deuxfleurs collective to run on modest hardware across several physical locations, with replication built in. It is light on RAM and simple to operate. It is licensed under AGPL-3.0, which is fine for running it as infrastructure, but worth a quick check with your legal team if you plan to modify and distribute it. Choose Garage when: you want three small nodes in three places (home lab, office, VPS) instead of one big server. Trade-off: it implements the core S3 API, not every advanced feature, so check that your SDK calls (versioning, object lock, some ACL operations) are supported before you commit. 4. Ceph RGW: enterprise only Ceph's RADOS Gateway is extremely capable, but it is a full distributed storage platform. Unless you already run Ceph or have a dedicated storage team, it is too heavy for a typical web app or SaaS. 5. Managed S3-compatible storage Sometimes the right answer is to stop self-hosting storage. Providers such as Cloudflare R2, Backblaze B2, Hetzner Object Storage or Wasabi give you an S3 endpoint for a low monthly price. You trade control for zero maintenance. For backups, I often recommend both : self-hosted for the app, plus an offsite managed bucket for disaster recovery. How to choose in 60 seconds One server, a few hundred GB, want it working today: RustFS. Millions of files or multi-server growth: SeaweedFS. Several small nodes in different locations: Garage. No time to run storage at all: a managed S3-compatible provider. Already running Ceph: Ceph RGW. Step-by-step: migrating from MinIO without downtime Step 1: Inventory what you have List buckets, sizes, and which apps use which credentials. Check for bucket policies, lifecycle rules and public-read buckets, because these are the settings people forget to recreate. Step 2: Start the new server next to the old one Run RustFS (or your choice) on different ports or a different host. Create the same bucket names and a dedicated access key per application. Step 3: Copy the data with rclone rclone speaks S3 to both sides and can be re-run safely. Configure two remotes, then sync: # ~/.config/rclone/rclone.conf [old] type = s3 provider = Minio endpoint = http://127.0.0.1:9000 access_key_id = OLD_KEY secret_access_key = OLD_SECRET [new] type = s3 provider = Other endpoint = http://127.0.0.1:9100 access_key_id = NEW_KEY secret_access_key = NEW_SECRET # copy everything, then re-run right before the switch to catch new uploads rclone sync old:uploads new:uploads --progress --checksum rclone copies every object with the same key, so your URLs never change. Run it again right before the switch to catch new uploads. Step 4: Point the app at the new endpoint In most SDKs the change is two environment variables. One setting matters for every MinIO-style server: path-style addressing . Here is the Node.js client config this website uses: import { S3Client } from "@aws-sdk/client-s3"; const s3 = new S3Client({ endpoint: process.env.S3_ENDPOINT, // https://s3.yourdomain.com region: "us-east-1", // any value works for self-hosted forcePathStyle: true, // http://host/<bucket>/<key> credentials: { accessKeyId: process.env.S3_ACCESS_KEY!, secretAccessKey: process.env.S3_SECRET_KEY!, }, }); Keep object keys identical and your public URLs never change. On this site, every upload is served through the API as /files/<key> , and if a key is not found in the bucket it falls back to local disk. That one fallback let me migrate gradually with zero broken images. Step 5: Final sync, switch, watch Run rclone sync one last time, deploy the new endpoint, and watch logs for 403 or 404 errors for a day. Keep the old MinIO data read-only for a week before deleting anything. Don't forget backups Moving storage is the perfect moment to fix backups. A bucket on the same disk as your app is not a backup. Schedule rclone sync to an offsite provider every night and test a restore. If you want a deeper walkthrough of server and database backups, read my complete guide to Linux backups . Frequently asked questions Can I keep using MinIO in 2026? The software still runs, but the community repository is archived and no longer receives fixes. For internal test environments that is acceptable for a while. For anything exposed to the internet or holding customer data, plan a migration. Is RustFS production ready? RustFS has a stable 1.x release line and covers the core S3 API well. I run it in production for this website. As with any young project, pin a version, monitor it, and keep offsite backups. Do I need to change my application code? Usually not. If your app uses an AWS S3 SDK, you change the endpoint, credentials and possibly enable path-style addressing. Object keys and bucket names stay the same. What is the cheapest way to get S3 storage? For small projects, a self-hosted RustFS or Garage node on a VPS you already pay for costs nothing extra. For large or critical data, a managed S3-compatible provider is often cheaper than the engineering time to run storage yourself. How long does a migration take? For a typical web app with tens of gigabytes, a careful migration takes a few hours of work plus the copy time. Most of the effort is inventory and testing, not the copy itself. Need help moving off MinIO? I plan and run storage migrations, set up self-hosted S3 with TLS and backups, and make sure nothing breaks along the way. See my DevOps services or contact me with your current setup and I will reply with a clear plan and a fixed price. If you are also rethinking where your app runs, my comparison of Vercel vs self-hosting costs is a good next read.
Read article →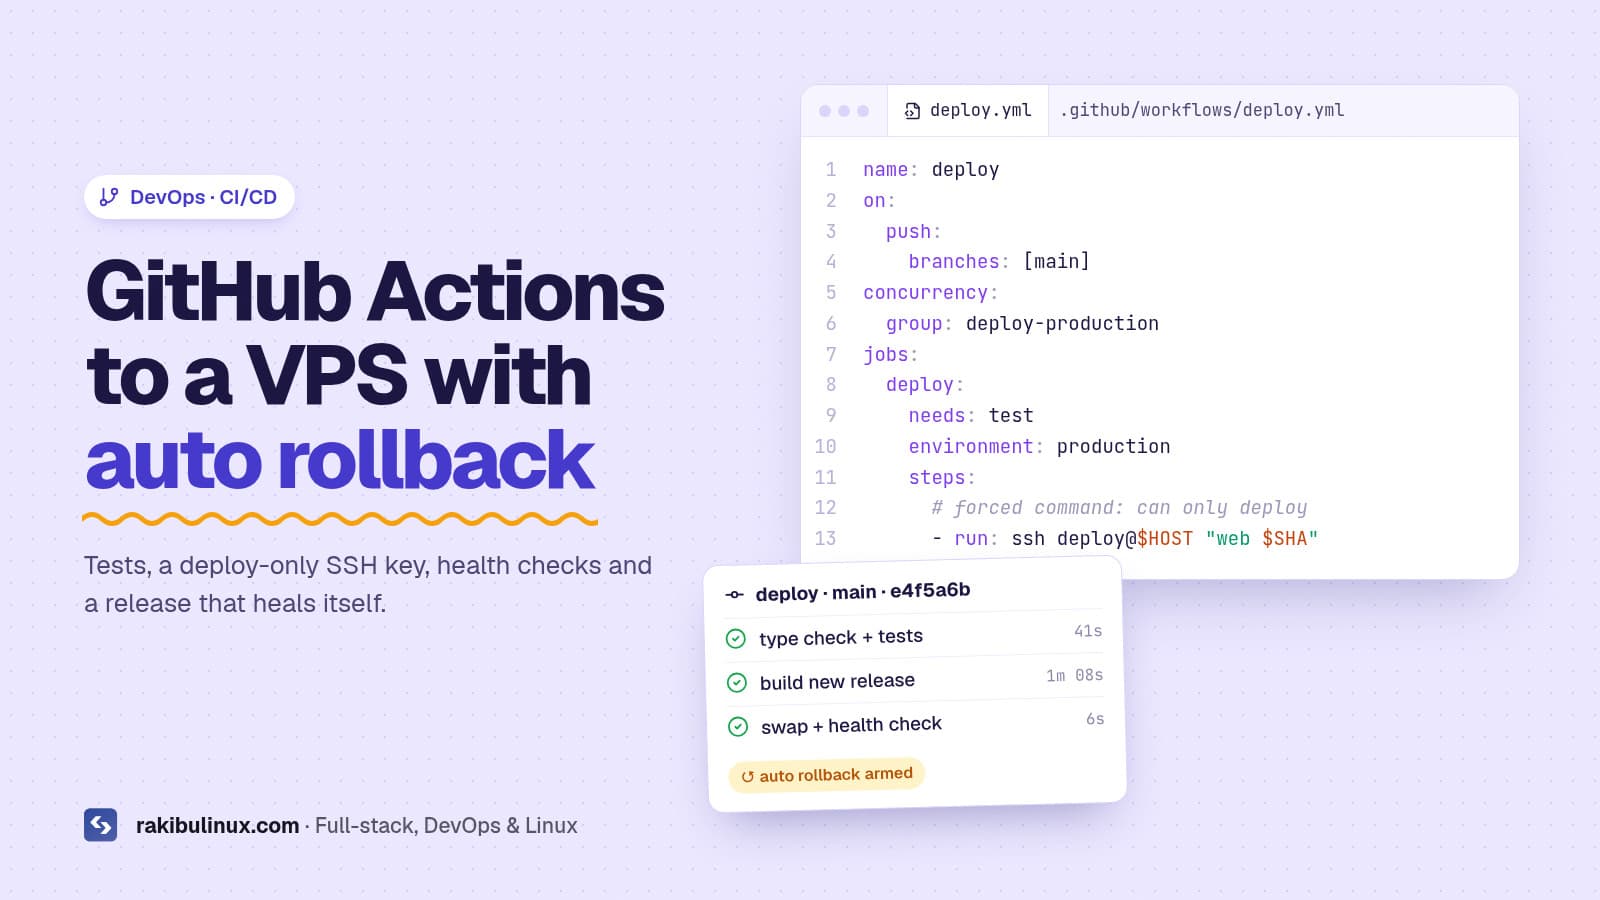
GitHub Actions CI/CD to a VPS with Automatic Rollback
Safe GitHub Actions deploys to a VPS: run tests, SSH in with a deploy-only key, build a fresh release, health-check it and roll back automatically on failure. Most "deploy to VPS with GitHub Actions" tutorials stop at ssh server "git pull && npm run build && pm2 restart" . That works until the day the build fails halfway and your site goes down, or a leaked CI secret gives someone a root shell on your server. In this guide I show the pipeline that deploys this website and its API: every push to main goes live in a few minutes, a broken release rolls itself back, and the CI key cannot do anything except deploy. Key takeaways Never build in the live folder. Build each release in a new directory and switch a symlink only after it succeeds. Restrict the deploy key with a forced command in authorized_keys , so the CI secret can only trigger a deploy. Health-check after every switch and roll back automatically on failure. Back up the database before migrations. Code rolls back in seconds; data does not. Use a concurrency group so two pushes never deploy at the same time. The architecture You push to main . GitHub Actions installs dependencies, runs the type check and tests. If they pass, the workflow SSHes to the server with a dedicated deploy key and sends only the commit SHA. The server's deploy script builds that commit in a fresh release folder, backs up the database, runs migrations, switches the current symlink and reloads PM2. A health check calls the app. If it fails, the symlink goes back to the previous release and the script exits with an error, which turns the GitHub run red. The heavy logic lives on the server in one script, not in YAML. That makes the pipeline easy to test by hand and easy to reuse for several apps. Each stage must pass before the next one runs. If the health check fails, the symlink goes back to the previous release automatically. Step 1: Create a locked-down deploy key Generate a key pair just for CI (no passphrase, since Actions runs unattended): ssh-keygen -t ed25519 -f deploy_key -N "" -C "github-actions-deploy" On the server, add the public key to the deploy user's ~/.ssh/authorized_keys with a forced command and every extra capability turned off: command="/usr/local/bin/deploy-gate",restrict ssh-ed25519 AAAA...your-key... github-actions-deploy Whatever command the client asks for, SSH runs deploy-gate instead and puts the requested command in $SSH_ORIGINAL_COMMAND . The gate validates it strictly: #!/usr/bin/env bash # /usr/local/bin/deploy-gate: the only thing the CI key can run set -euo pipefail read -r app sha extra <<< "${SSH_ORIGINAL_COMMAND:-}" [[ "$app" =~ ^(web|api)$ ]] || { echo "bad app"; exit 1; } [[ "$sha" =~ ^[0-9a-f]{40}$ ]] || { echo "bad sha"; exit 1; } [[ -z "${extra:-}" ]] || { echo "unexpected args"; exit 1; } exec /usr/local/bin/app-deploy "$app" "$sha" If this key ever leaks, the worst an attacker can do is redeploy a commit that already exists in your repository. That is a huge improvement over a key with a full shell. Step 2: Add the secrets to GitHub In your repository go to Settings → Secrets and variables → Actions and add: DEPLOY_KEY : the private key file contents. DEPLOY_HOST : the server IP or hostname. DEPLOY_KNOWN_HOSTS : the output of ssh-keyscan your-server , so the runner verifies the server's identity instead of trusting the first key it sees. Step 3: The workflow file # .github/workflows/deploy.yml name: deploy on: push: branches: [main] workflow_dispatch: concurrency: group: deploy-production cancel-in-progress: false jobs: test: runs-on: ubuntu-latest steps: - uses: actions/checkout@v4 - uses: actions/setup-node@v4 with: { node-version: lts/*, cache: npm } - run: npm ci - run: npx tsc --noEmit - run: npm test --if-present deploy: needs: test runs-on: ubuntu-latest environment: production steps: - name: Deploy run: | install -m 700 -d ~/.ssh echo "${{ secrets.DEPLOY_KEY }}" > ~/.ssh/id_ed25519 echo "${{ secrets.DEPLOY_KNOWN_HOSTS }}" > ~/.ssh/known_hosts chmod 600 ~/.ssh/id_ed25519 ssh deploy@${{ secrets.DEPLOY_HOST }} "web ${{ github.sha }}" The environment: production line lets you add required reviewers or a wait timer in GitHub later, without touching the workflow. The concurrency block queues deploys instead of running them in parallel. Step 4: The server-side deploy script This is a trimmed version of the script that deploys my API. The web app version is the same without the database steps. #!/usr/bin/env bash # /usr/local/bin/app-deploy <app> <sha> set -euo pipefail APP=$1 SHA=$2 BASE=/srv/myproject/$APP REL=$BASE/releases/$(date +%Y%m%d%H%M%S)-${SHA:0:7} PREV=$(readlink -f "$BASE/current" || true) exec >> /var/log/app-deploy/$APP-$(date +%F).log 2>&1 git -C "$BASE/repo.git" fetch --quiet origin main git --git-dir="$BASE/repo.git" worktree add --detach "$REL" "$SHA" ln -s "$BASE/shared/.env" "$REL/.env" cd "$REL" && npm ci && npm run build if [[ $APP == api ]]; then set -a; . "$BASE/shared/.env"; set +a # loads DATABASE_URL pg_dump "$DATABASE_URL" | gzip > "$BASE/shared/db-backups/$(date +%F-%H%M)-${SHA:0:7}.sql.gz" npx prisma migrate deploy fi ln -sfn "$REL" "$BASE/current" pm2 reload "$APP" --update-env for i in {1..10}; do curl -fsS --max-time 5 "http://127.0.0.1:$(cat $BASE/shared/port)/health" >/dev/null && ok=1 && break sleep 3 done if [[ -z "${ok:-}" ]]; then echo "health check failed for $SHA, rolling back to $PREV" [[ -n "$PREV" ]] && ln -sfn "$PREV" "$BASE/current" && pm2 reload "$APP" --update-env exit 1 fi # keep the newest 5 releases and 30 database backups ls -1dt "$BASE"/releases/* | tail -n +6 | xargs -r rm -rf git --git-dir="$BASE/repo.git" worktree prune ls -1t "$BASE"/shared/db-backups/* | tail -n +31 | xargs -r rm -f echo "deployed $APP $SHA" Why database rollbacks need special care Rolling back code is instant. Rolling back a database migration is not, because new data may already have been written. Two rules keep this safe: Write backward-compatible migrations. Add columns and tables first, deploy code that uses them, and remove old columns in a later release (the expand-and-contract pattern). Then the previous release still works against the new schema, and the automatic rollback is safe. Back up before every migration. The pg_dump step above gives you a restore point tied to the exact commit. Step 5: Add a real health endpoint Checking that the homepage returns 200 is a good start. A better check is a small /health route that confirms the database connection and any critical dependency, returns quickly, and never requires authentication. In NestJS the @nestjs/terminus package makes this easy; in Next.js a simple route handler is enough. Common mistakes I fix for clients Building on the live folder , so a failed npm install takes the site down. Using the root SSH key in CI , giving every workflow full control of the server. Skipping host key verification with StrictHostKeyChecking=no . No concurrency control , so two quick pushes race and leave a half-deployed state. Secrets in the repository instead of a shared env file on the server or GitHub secrets. No logs , so nobody knows why last night's deploy failed. Frequently asked questions Is GitHub Actions free for deployments? Public repositories get free minutes on standard runners, and private repositories get a monthly free allowance depending on your plan. A pipeline like this uses only a few minutes per deploy because the build runs on your server. Should the build run in GitHub Actions or on the server? Both work. Building on the server keeps the workflow simple and avoids copying large artifacts. Building in CI (or producing a Docker image) keeps the server lighter. For small and medium apps, building on the server with a separate release folder is a solid choice. How do I deploy to multiple servers? Run the same deploy command against each host in a matrix job, or switch to a tool like Kamal that handles multi-server rolling deploys for you. How do I roll back manually? Re-run the workflow for an older commit, or SSH in and point the current symlink at the previous release, then reload PM2. Is this approach secure enough for production? With a restricted deploy key, verified host keys, secrets outside the repo and a hardened server, yes. Pair it with my Ubuntu server hardening checklist . Want a pipeline like this? I build CI/CD pipelines for Next.js, Node.js and NestJS apps with tests, safe migrations, health checks and automatic rollback, and I document everything so your team can own it. Start with my guide to deploying Next.js 16 on a VPS , check my DevOps services , or get in touch .
Read article →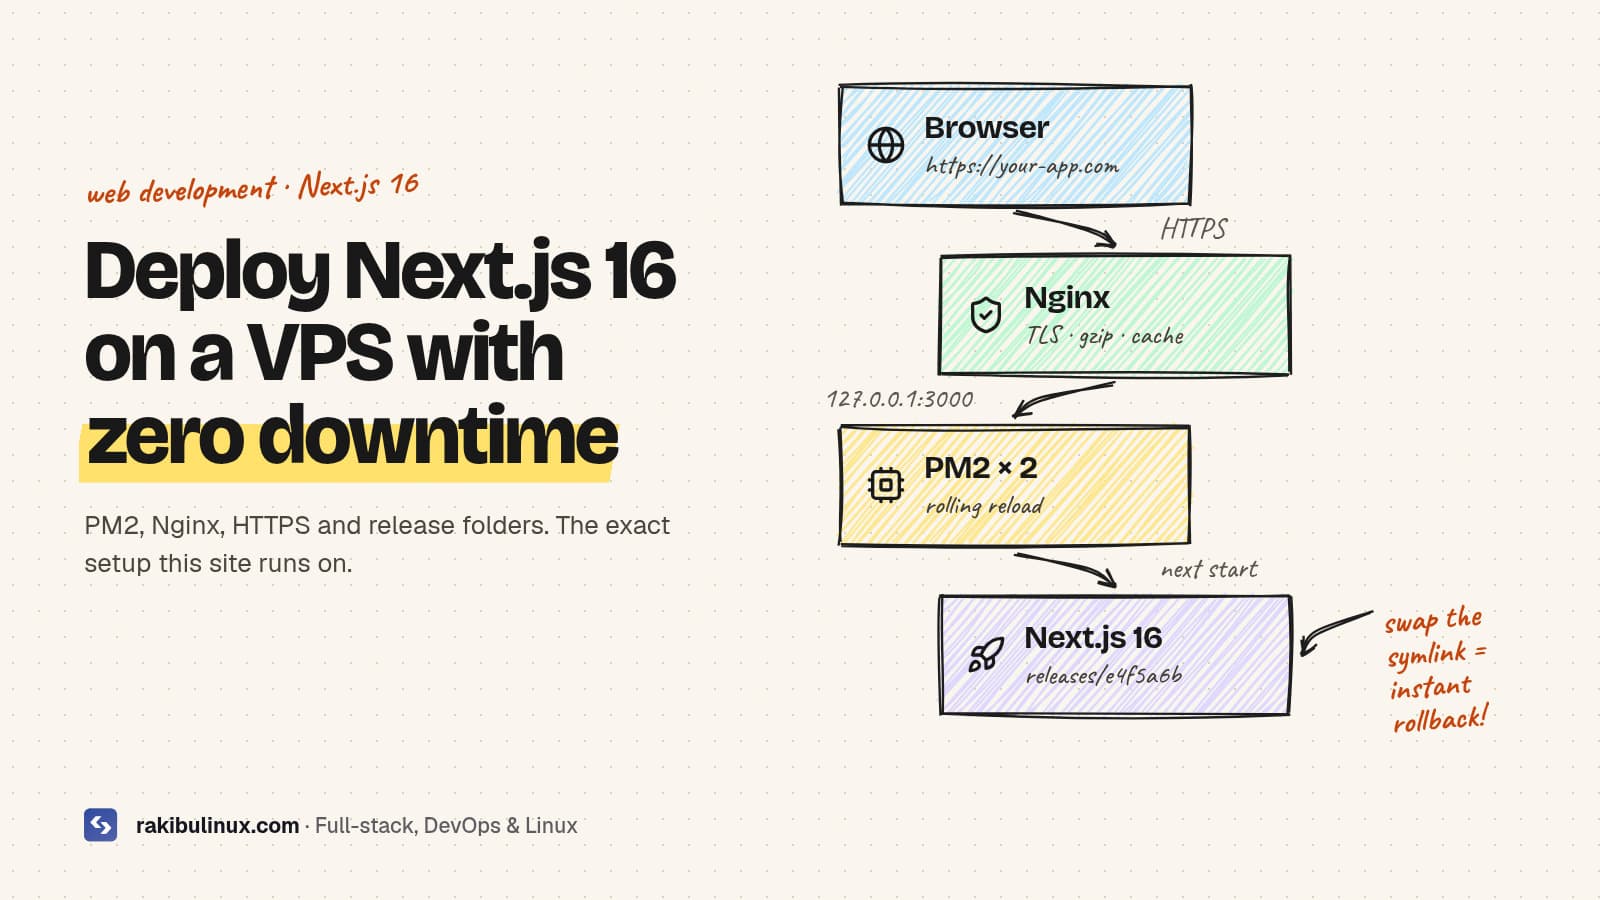
Deploy Next.js 16 on a VPS: PM2, Nginx, Zero Downtime
Deploy Next.js 16 on a VPS by building on the server, running PM2 behind Nginx with HTTPS, and swapping release folders for zero-downtime deploys and rollbacks. This exact setup runs the website you are reading right now: a Next.js 16 App Router site with React 19, served by PM2 on an Ubuntu VPS behind Nginx, deployed automatically from GitHub. It costs a fraction of a managed platform, handles traffic spikes well, and I can roll back a bad release in seconds. Below is the full playbook, including the small details that tutorials usually skip. Key takeaways Next.js 16 needs Node.js 20.9 or newer . Use the current LTS. PM2 keeps the app alive, restarts it on crashes and on reboot, and can run several instances. Nginx terminates HTTPS, compresses responses and caches /_next/static files for a year. Release folders + a current symlink give you zero-downtime deploys and one-command rollbacks. NEXT_PUBLIC_* variables are baked in at build time. Changing them means rebuilding, not just restarting. What you need A VPS with at least 2 GB RAM (builds are memory hungry; 4 GB is comfortable). Ubuntu 24.04 LTS is my default. A domain pointing at the server (an A record for www and the apex). A non-root user with sudo, SSH keys, and a firewall. If you have not done this yet, follow my Ubuntu 24.04 hardening checklist first. Step 1: Install Node.js, PM2 and Nginx sudo apt update && sudo apt install -y nginx git # Node.js LTS from NodeSource (or use nvm / fnm if you prefer) curl -fsSL https://deb.nodesource.com/setup_lts.x | sudo -E bash - sudo apt install -y nodejs sudo npm install -g pm2 node -v # must be 20.9+ for Next.js 16 If your project uses bun or pnpm, install it now too. This site builds with bun; the steps are identical. Step 2: Use a release folder layout The single biggest upgrade over "git pull and restart" is building each deploy in its own folder. The live app never sees a half-built .next directory. /srv/myapp/ ├── releases/ │ ├── 20261005-0912-a1b2c3d/ │ └── 20261005-1430-e4f5a6b/ ├── shared/ │ └── .env.local # secrets live here, symlinked into each release └── current -> releases/20261005-1430-e4f5a6b A deploy becomes: clone the commit into a new release folder, link the shared env file, install, build, then point current at it. Rolling back is pointing current at the previous folder. Step 3: Build the app REL=/srv/myapp/releases/$(date +%Y%m%d-%H%M)-$(git rev-parse --short HEAD) git clone --depth 1 https://github.com/you/myapp.git "$REL" ln -s /srv/myapp/shared/.env.local "$REL/.env.local" cd "$REL" && npm ci && npm run build Two production details: Environment variables. Anything starting with NEXT_PUBLIC_ is inlined into the JavaScript bundle during next build . The env file must exist before the build. Image optimization. next/image uses sharp on the server. Recent Next.js versions install it automatically; if you see slow or failing image requests, check that it built for your platform. Optional: set output: "standalone" in next.config.ts to get a minimal server.js with only the dependencies you need. It is great for Docker images. For a plain VPS, next start is simpler and works fine. Step 4: Run it with PM2 Create ecosystem.config.js outside the releases folder so it survives deploys: module.exports = { apps: [{ name: "myapp", cwd: "/srv/myapp/current", script: "node_modules/next/dist/bin/next", args: "start -p 3000", instances: 2, // or "max" for one per CPU core exec_mode: "cluster", max_memory_restart: "800M", env: { NODE_ENV: "production" }, }], }; pm2 start /srv/myapp/ecosystem.config.js pm2 save pm2 startup # prints a command; run it so PM2 starts on boot Cluster mode with two or more instances lets pm2 reload myapp restart workers one at a time, so there is always a process answering requests. pm2 reload restarts workers one at a time. While one loads the new release, Nginx keeps sending traffic to the other, so visitors never see downtime. One caveat with several instances: each one keeps its own in-memory and on-disk cache for ISR and revalidateTag . On a single VPS this is usually fine. If you see stale pages after revalidation, run one instance or configure a shared cache handler. Step 5: Put Nginx in front server { listen 80; server_name www.example.com example.com; location /_next/static/ { proxy_pass http://127.0.0.1:3000; add_header Cache-Control "public, max-age=31536000, immutable"; } location / { proxy_pass http://127.0.0.1:3000; proxy_http_version 1.1; proxy_set_header Host $host; proxy_set_header X-Real-IP $remote_addr; proxy_set_header X-Forwarded-For $proxy_add_x_forwarded_for; proxy_set_header X-Forwarded-Proto $scheme; proxy_set_header Upgrade $http_upgrade; proxy_set_header Connection "upgrade"; } } sudo nginx -t && sudo systemctl reload nginx sudo apt install -y certbot python3-certbot-nginx sudo certbot --nginx -d example.com -d www.example.com Certbot adds the HTTPS server block and renews certificates automatically. For SEO, pick one canonical host (I use www ) and 301-redirect the other one in a single hop. Mixed hosts split your ranking signals. Keep port 3000 closed in the firewall. Only Nginx should talk to Next.js. Step 6: Zero-downtime deploys and instant rollback Put the steps into one script so every deploy is identical: #!/usr/bin/env bash set -euo pipefail APP=/srv/myapp SHA=$1 REL=$APP/releases/$(date +%Y%m%d-%H%M)-${SHA:0:7} PREV=$(readlink -f $APP/current || true) git clone --quiet https://github.com/you/myapp.git "$REL" git -C "$REL" checkout --quiet "$SHA" ln -s $APP/shared/.env.local "$REL/.env.local" (cd "$REL" && npm ci && npm run build) ln -sfn "$REL" $APP/current pm2 reload myapp --update-env # health check, roll back on failure sleep 5 if ! curl -fsS --max-time 10 http://127.0.0.1:3000/ >/dev/null; then echo "health check failed, rolling back" ln -sfn "$PREV" $APP/current pm2 reload myapp --update-env exit 1 fi # keep the 5 newest releases ls -1dt $APP/releases/* | tail -n +6 | xargs -r rm -rf Because the build happens in a fresh folder while the old release keeps serving traffic, a failing build never takes the site down. The only switch is an atomic symlink change plus a rolling reload. The next step is triggering this script from GitHub on every push to main . I explain the full pipeline, including a locked-down deploy key, in GitHub Actions CI/CD to a VPS with automatic rollback . Performance checklist after go-live Run Lighthouse on the homepage and a blog post. Your hero heading or image is usually the LCP element; do not hide it behind a fade-in animation. Confirm /_next/static responses return the long cache header. Check pm2 monit memory over a day and tune max_memory_restart . Set up uptime monitoring (UptimeRobot, Better Stack or a simple cron + curl) so you hear about downtime before customers do. Frequently asked questions Can Next.js 16 run without Vercel? Yes. next start is a full Node.js server that supports the App Router, server components, server actions, ISR, middleware and image optimization. Some platform extras, like Vercel's edge network and preview URLs, you replace with your own tools. How much RAM does a Next.js VPS need? Running a typical site uses a few hundred MB per instance. Building is the heavy part; 2 GB works for small apps, 4 GB is comfortable. Add swap on small servers so builds do not get killed. Should I use Docker or PM2? Both are good. PM2 on the host is simpler for one or two apps on a single server. Docker (often with output: "standalone" ) is better when you run many services or want identical environments everywhere. Is self-hosting Next.js cheaper than Vercel? Usually, yes, once you have real traffic or several projects. I broke down the numbers in Vercel vs self-hosting in 2026 . How do I roll back a bad deploy? With the release-folder layout, point the current symlink at the previous release and run pm2 reload . It takes seconds and needs no rebuild. Want this set up for your app? I deploy Next.js, Node.js and NestJS apps to VPS servers with HTTPS, CI/CD, monitoring and backups, and hand over clear documentation. Browse my web development services , see recent projects , or tell me about your app .
Read article →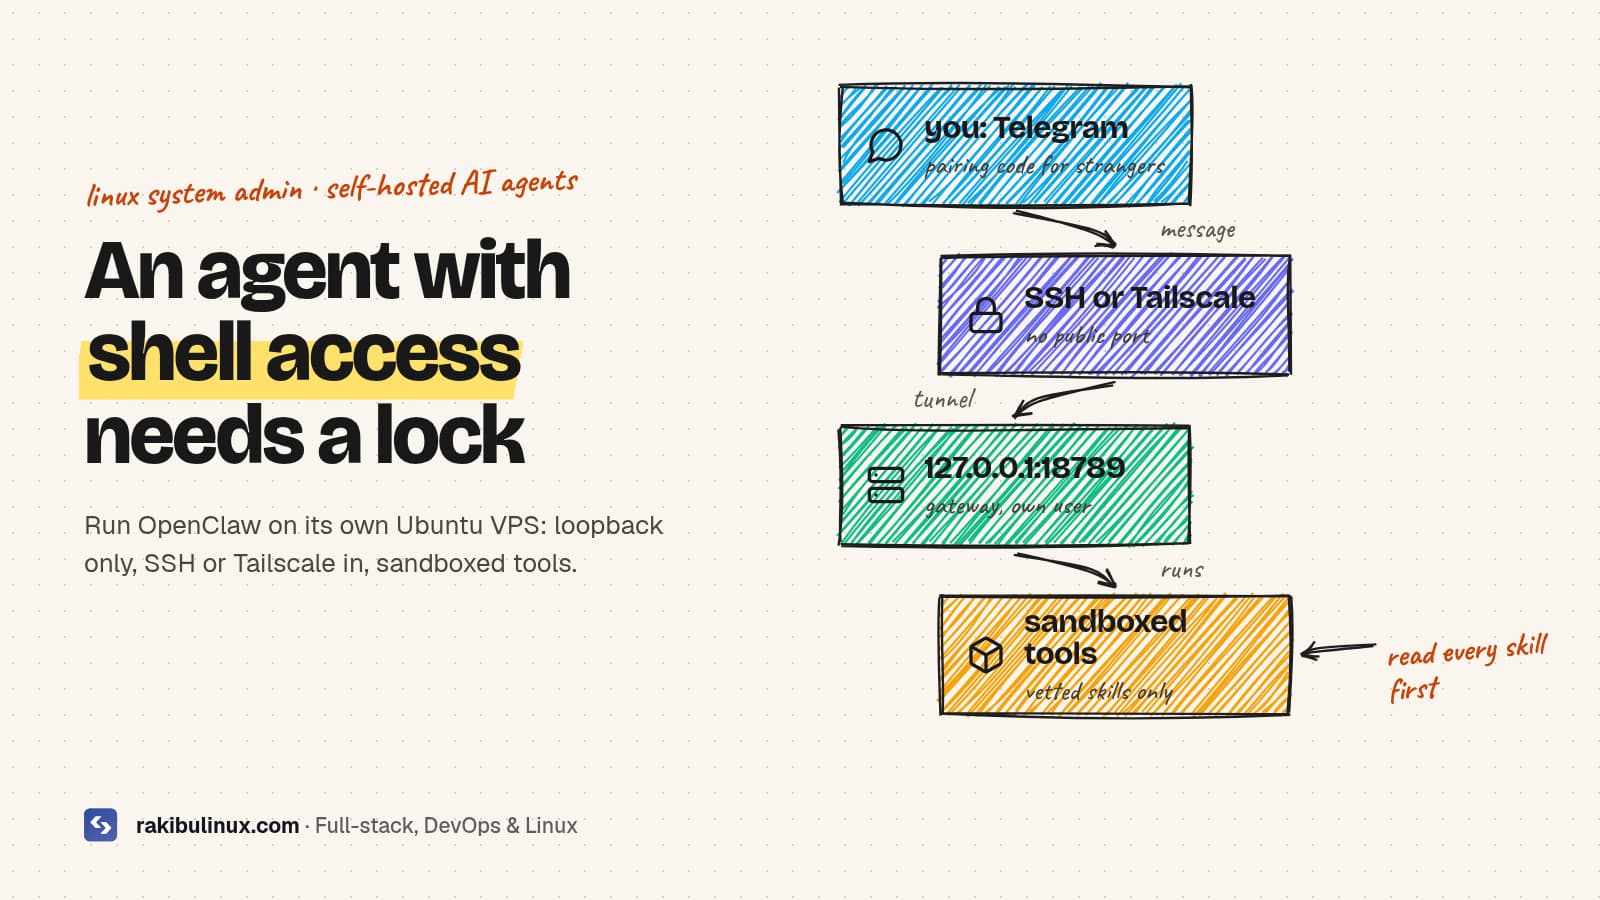
OpenClaw on a VPS: Install and Secure It (2026 Guide)
OpenClaw is an open-source AI agent that acts for you from chat apps. Run it on its own VPS, keep the gateway on loopback, and reach it over SSH or Tailscale. When I first wrote about OpenClaw in February 2026, it was the most talked-about open-source project of the year: an assistant you message on WhatsApp or Telegram that actually reads your email, runs commands and automates tasks. Since then it has also become a security lesson. Researchers found tens of thousands of gateways exposed to the internet, several serious CVEs, and over a thousand malicious skills on its ClawHub registry. I now set it up for clients the way I'd set up any service with shell access: isolated, private and audited. This guide explains what OpenClaw is and walks through that setup on Ubuntu. Key takeaways OpenClaw is an agent, not a chatbot. It runs on your machine or server and can execute commands, use a browser and act in your accounts. Give it its own VPS and its own Linux user, not your laptop or a server with production data. Keep the gateway on loopback ( 127.0.0.1:18789 , the default) and reach it through an SSH tunnel or Tailscale Serve. Never open it to the internet. Treat ClawHub skills like untrusted code. Malicious skills that steal credentials have been found there repeatedly. Run openclaw security audit after setup and after every config change, and keep OpenClaw updated. What is OpenClaw? OpenClaw is a free, open-source personal AI assistant, first released in November 2025 by developer Peter Steinberger under the names Clawdbot and then Moltbot. It's now maintained by the OpenClaw Foundation. You install a gateway on a computer or server, connect a model (Claude, GPT, or a local model through Ollama), and talk to it through chat apps you already use: Telegram, WhatsApp, Slack, Discord, Signal and others. The difference from ChatGPT is that OpenClaw takes actions. With the right permissions it can sort email, manage a calendar, browse websites, edit files, run shell commands and call APIs. It keeps memory between conversations and can be extended with "skills" from the community registry, ClawHub. That power is the reason to use it, and the reason it needs careful hosting. Is OpenClaw safe? OpenClaw ships with sensible defaults: the gateway binds to loopback, unknown people who message your bot get a pairing code instead of a response, and group chats are allowlisted. The incidents in 2026 mostly came from people changing those defaults or trusting third-party code: Exposed gateways. Internet scans found very large numbers of OpenClaw gateways reachable from the public internet, many without authentication. Anyone who reaches an unauthenticated gateway can control the agent. Vulnerabilities. CVE-2026-25253 (CVSS 8.8), disclosed in January 2026, let a crafted link leak the gateway token through the Control UI. More high-severity CVEs followed. Old versions stay vulnerable. Malicious skills. Security firms including Bitdefender reported skills on ClawHub that installed info-stealing malware, disguised as productivity tools. By April 2026 more than 1,400 had been identified. So: safe enough when isolated, updated and kept private; risky on your main laptop with every permission switched on. Step 1: Give OpenClaw its own server and user Use a fresh, small Ubuntu 24.04 VPS that holds nothing else: no production database, no client files, no SSH keys to other servers. If the agent is tricked by a prompt injection or a bad skill, the damage stays in that box. Harden it first with my Ubuntu 24.04 hardening checklist (key-only SSH, firewall, automatic updates), then create a normal user for OpenClaw: sudo adduser --disabled-password --gecos "" claw sudo install -d -m 700 -o claw -g claw /home/claw/.ssh sudo cp ~/.ssh/authorized_keys /home/claw/.ssh/ && sudo chown claw:claw /home/claw/.ssh/authorized_keys sudo ufw default deny incoming sudo ufw allow OpenSSH sudo ufw enable Don't add claw to the sudo group. The agent shouldn't be able to become root. Step 2: Install OpenClaw Log in as claw . OpenClaw needs Node.js 24.16+ or 26.1+; the official installer adds a suitable Node version if it's missing. As with any curl | bash , you can download the script and read it first: curl -fsSL https://openclaw.ai/install.sh -o install.sh less install.sh bash install.sh The installer starts onboarding, which asks for your workspace, model provider and API key, gateway settings and chat channels. Keep the gateway bind on loopback when asked. To install the gateway as a service that survives reboots and logouts: openclaw onboard --install-daemon sudo loginctl enable-linger claw # keep the user service running without a login systemctl --user status openclaw-gateway openclaw doctor On Linux the gateway runs as a systemd user service. openclaw doctor checks the install and config, and openclaw doctor --fix repairs legacy settings after upgrades. You reach the gateway through an encrypted tunnel to localhost. Internet scanners hit the firewall and see nothing, because the gateway never listens on a public interface. Step 3: Keep the gateway private The gateway's WebSocket and Control UI listen on 127.0.0.1:18789 by default. Leave it that way. Check it: ss -tlnp | grep 18789 # must show 127.0.0.1:18789, never 0.0.0.0 or [::] To use the Control UI or the CLI from your laptop, forward the port over SSH: ssh -N -L 18789:127.0.0.1:18789 claw@your-vps # then open http://127.0.0.1:18789 on your laptop If you want access from your phone or several devices, Tailscale Serve is the officially supported option: it publishes the loopback port only inside your private tailnet, with HTTPS. Don't put the gateway behind a public Nginx reverse proxy unless you follow OpenClaw's exposure runbook and use trusted-proxy authentication. And if you run OpenClaw in Docker, remember that published container ports bypass UFW; see Docker bypasses UFW . Step 4: Sandbox tools and vet skills OpenClaw can run tool calls inside Docker or Podman sandboxes instead of directly on the host. The documented minimal setup in ~/.openclaw/openclaw.json : { agents: { defaults: { sandbox: { mode: "non-main", scope: "session", workspaceAccess: "none", }, }, }, } Then be strict about skills: Install as few as possible , from authors you can identify. Read the skill before installing. Red flags: install steps that download and run binaries, obfuscated scripts, requests for credentials unrelated to the task. Don't give the agent your main email, password manager or crypto wallets. Use separate accounts with limited scopes where you can. Watch for prompt injection. Any web page or email the agent reads can contain instructions. Keep risky tools behind approval. Step 5: Audit and update openclaw security audit openclaw status openclaw security audit checks your config against OpenClaw's security baseline (exposure, auth, channel access, tool permissions) and lists findings in priority order. Run it after setup, after every config change and after updates. Then update regularly: most of 2026's serious CVEs were fixed quickly, and the exposed instances that got abused were usually old versions. What is OpenClaw good for? Personal admin: inbox triage, reminders, calendar, summaries sent to your phone. Developer chores: checking CI, summarising logs, opening issues, running scripts in a sandbox. Research: browsing, collecting and summarising sources on a schedule. Private AI: paired with a local model, nothing leaves your server. My guide to self-hosting an LLM with Ollama covers that side. If you're building your own tools for agents instead, see how to build an MCP server in TypeScript . Frequently asked questions What is OpenClaw used for? OpenClaw is a self-hosted AI agent you control through chat apps like Telegram or WhatsApp. People use it to automate email, calendars, research, browsing and developer tasks, because it can take actions instead of only answering. Is OpenClaw free? OpenClaw itself is free and open source. You pay for the server it runs on and for the AI model it uses, unless you run a local model with Ollama. Can I run OpenClaw on a VPS? Yes, and it's the setup I recommend: a dedicated Ubuntu VPS, a non-root user, the gateway installed as a systemd user service, and access over an SSH tunnel or Tailscale, with no public port. Is it safe to install skills from ClawHub? Only after reviewing them. Security researchers have found more than a thousand malicious skills on ClawHub that stole credentials. Install few skills, read their code and install steps, and run tools in a sandbox. What port does OpenClaw use? The gateway listens on port 18789 on loopback (127.0.0.1) by default, configurable with gateway.port . Keep it off public interfaces. Want OpenClaw set up securely? I deploy OpenClaw and other self-hosted AI tools on isolated, hardened Linux servers with private access, sandboxing, backups and updates, so you get the automation without exposing your accounts. See my Linux system admin services or tell me what you want to automate .
Read article →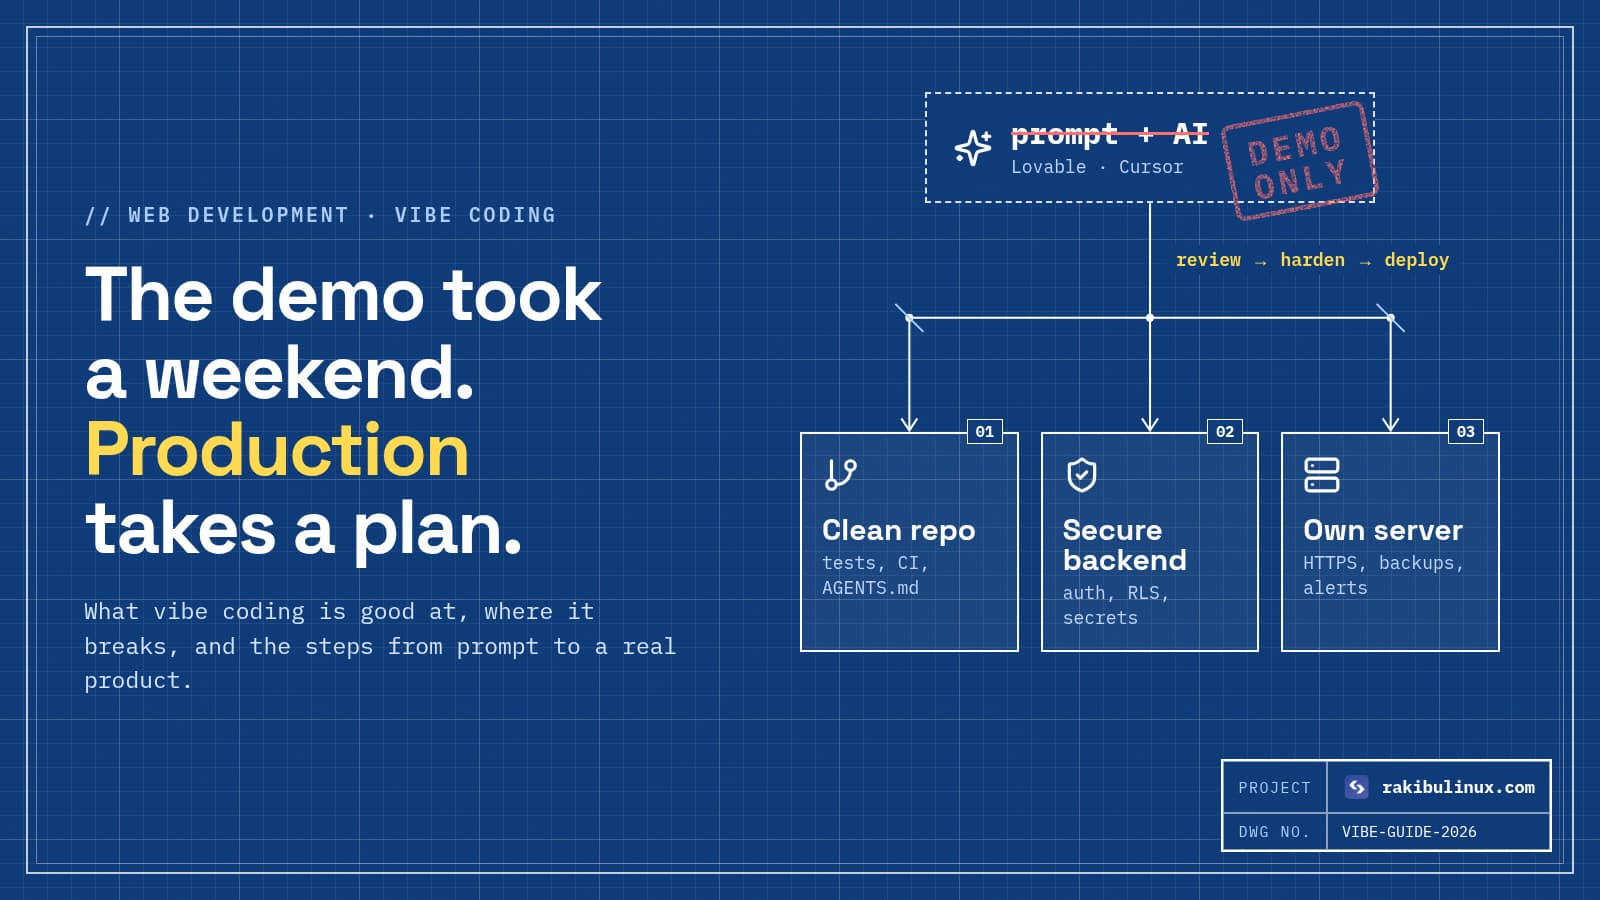
Vibe Coding Guide: From AI Prototype to Production App
Vibe coding is building software by describing what you want to an AI and iterating on the result. Great for prototypes; production still needs engineering. Most of my work in 2026 starts the same way: a founder has built something with Lovable, Bolt, Cursor or Claude Code. It looks great and mostly works, and now real users are coming. My job is turning that into software that is secure, deployed properly and maintainable. I also vibe code myself every day. This guide is what I've learned from both sides: what vibe coding is, which tools fit which job, where AI-generated apps break, and the exact steps from prototype to production. Key takeaways Vibe coding means prompting instead of typing code. The term was coined by Andrej Karpathy in February 2025 and was Collins Dictionary's Word of the Year 2025. There are two kinds of tools: app builders (Lovable, Bolt, Replit, v0) for non-developers, and AI coding agents (Cursor, Claude Code, Codex) for people who read code. It's excellent for prototypes, internal tools, UI and well-known CRUD patterns. It breaks at security (auth, database rules, secrets), architecture, deployment and long-term maintenance. Going to production means: own the code in GitHub, review security, add tests and CI, deploy to a real server, and set up backups and monitoring. What is vibe coding? Andrej Karpathy, a co-founder of OpenAI and former head of AI at Tesla, described vibe coding in a February 2025 post as giving in to the vibes and forgetting the code even exists: you describe what you want, accept what the AI writes, paste error messages back, and keep going. By November 2025 the phrase was Collins Dictionary's Word of the Year. In practice the term now covers a range. At one end, someone with no coding background builds a whole app by chatting with Lovable. At the other, a senior engineer uses Claude Code to write most of a feature, then reviews every diff. Both are "vibe coding", but only the second one includes someone who understands what was built. That difference decides whether the app survives contact with real users. Which vibe coding tools should you use? App builders: for founders and non-developers Lovable , Bolt , Replit and v0 generate a full app from a description, usually React with a hosted backend such as Supabase, and give you a live preview. They're the fastest way from idea to something clickable. The trade-off: you get less control over the architecture, and hosting, auth and database setup follow the tool's defaults. I compared them to custom builds in AI website builder vs custom website . AI coding agents: for developers Cursor , Claude Code , OpenAI Codex , Windsurf , AWS's Kiro and Google's Antigravity work inside a real codebase. They read your files, run commands and tests, and make multi-file changes you review. This is where serious products get built with AI. My hands-on comparison is in Claude Code vs Cursor vs Codex . A common and sensible path: prototype in an app builder, sync the code to GitHub, then continue in an AI coding agent with an engineer reviewing the changes. What vibe coding is good at Prototypes and MVPs you can put in front of users to test an idea in days. Internal tools and dashboards where the users are your own team. UI work: layouts, components, responsive styling and copy changes. Well-known patterns: CRUD screens, forms, auth flows from a library, API clients. Boring code: tests, migrations, type definitions, scripts and documentation. Where vibe-coded apps break These are the problems I find most often when someone sends me a vibe-coded app before launch: Security The biggest risk by far. Database tables without row-level security, so any logged-in user can read everyone's data. API keys and service-role secrets in front-end code. Admin checks done only in the browser. No rate limiting on login or AI endpoints that cost money. My vibe coding security checklist lists the 12 checks I run. Hallucinated or risky dependencies AI tools sometimes suggest npm packages that don't exist, and attackers register those names with malware. I wrote about this in slopsquatting . Architecture that doesn't grow Each prompt solves the problem in front of it, so after a few hundred prompts you get duplicated logic, three ways of fetching data, and files nobody wants to touch. The AI starts breaking things it fixed last week. Deployment and operations "It works in the preview" isn't hosting. Custom domains, HTTPS, environment variables, database backups, logs, uptime alerts and a way to roll back a bad release usually don't exist yet. AI gets the visible 80% done fast. The remaining work, security, tests, deployment and backups, is slower, mostly invisible in the demo, and is what decides whether real users can trust the app. From vibe coding to production: the steps This is the order I follow when taking over a vibe-coded app: Own the code. Connect the project to a GitHub repository you control. Lovable and Bolt both support GitHub sync. From now on main is the source of truth. Read it. An engineer reads the whole codebase once: data model, auth, API routes, environment variables, dependencies. This is where the big risks show up. Fix security first: server-side auth checks, row-level security on every table, secrets moved to server environment variables, rate limits, input validation. Rotate any key that was ever in the front end. Add guardrails for the AI. An AGENTS.md or CLAUDE.md file with the project's rules, commands and "never do this" list makes every future AI change better. See AGENTS.md and CLAUDE.md . Add tests and CI for the flows that make money or touch data: sign-up, login, payment, the main feature. CI runs them on every push, so the next prompt can't quietly break checkout. Deploy properly. A VPS with Nginx, HTTPS and PM2, or a managed platform, deployed from GitHub with automatic rollback. My step-by-step for Lovable apps is Lovable app to production on your own server . Operate it: nightly database backups that leave the server, uptime and error alerts, and a log you can search. Best practices for vibe coding well Write the plan first. A one-page spec with users, data and screens gives the AI a target and keeps the architecture consistent. Small prompts, small diffs. One feature or fix at a time, committed when it works, so you can go back. Read every diff that touches auth, payments or data. Let the AI write it; don't let it decide what's secure. Pin the stack. Tell the tool which framework, database and libraries to use, so it doesn't add a second of each. Treat the AI as a fast junior developer : great output, needs review, never the final word on architecture or security. Is vibe coding replacing developers? Not in my experience. It's changing what developers spend time on. Less typing of routine code, more reviewing, designing systems, securing them and running them in production. The people with the most to gain are those who combine AI speed with the engineering judgment to know when the AI is wrong. The apps with the most risk are the ones where nobody on the team can read the code. Frequently asked questions What does vibe coding mean? Vibe coding means building software by describing what you want in plain language to an AI tool, running the result, and iterating with more prompts, rather than writing the code by hand. Andrej Karpathy coined the term in February 2025. What is the best vibe coding tool? For non-developers building a first version, Lovable, Bolt or Replit. For developers working in a real codebase, Claude Code, Cursor or Codex. Many teams prototype in the first group and continue in the second once the code lives in GitHub. Can a vibe-coded app go to production? Yes, after an engineering pass. The code needs a security review, tests for critical flows, proper hosting with HTTPS and rollback, and backups and monitoring. Skipping those is how vibe-coded apps leak data. Is vibe coding safe? The process is fine; shipping unreviewed output isn't. The common issues are missing database access rules, exposed API keys, client-side-only permission checks and hallucinated dependencies. A pre-launch security review catches most of them. How much does it cost to make a vibe-coded app production-ready? It depends on the app's size and how many issues the review finds. A small app often needs a few days of security fixes, deployment and CI setup. Ask for a review first so the estimate is based on the actual code. Built something with AI and need it production-ready? I review vibe-coded apps, fix the security and architecture issues, and deploy them with CI, backups and monitoring, so you keep the speed and lose the risk. See my web development services or send me your project for a review.
Read article →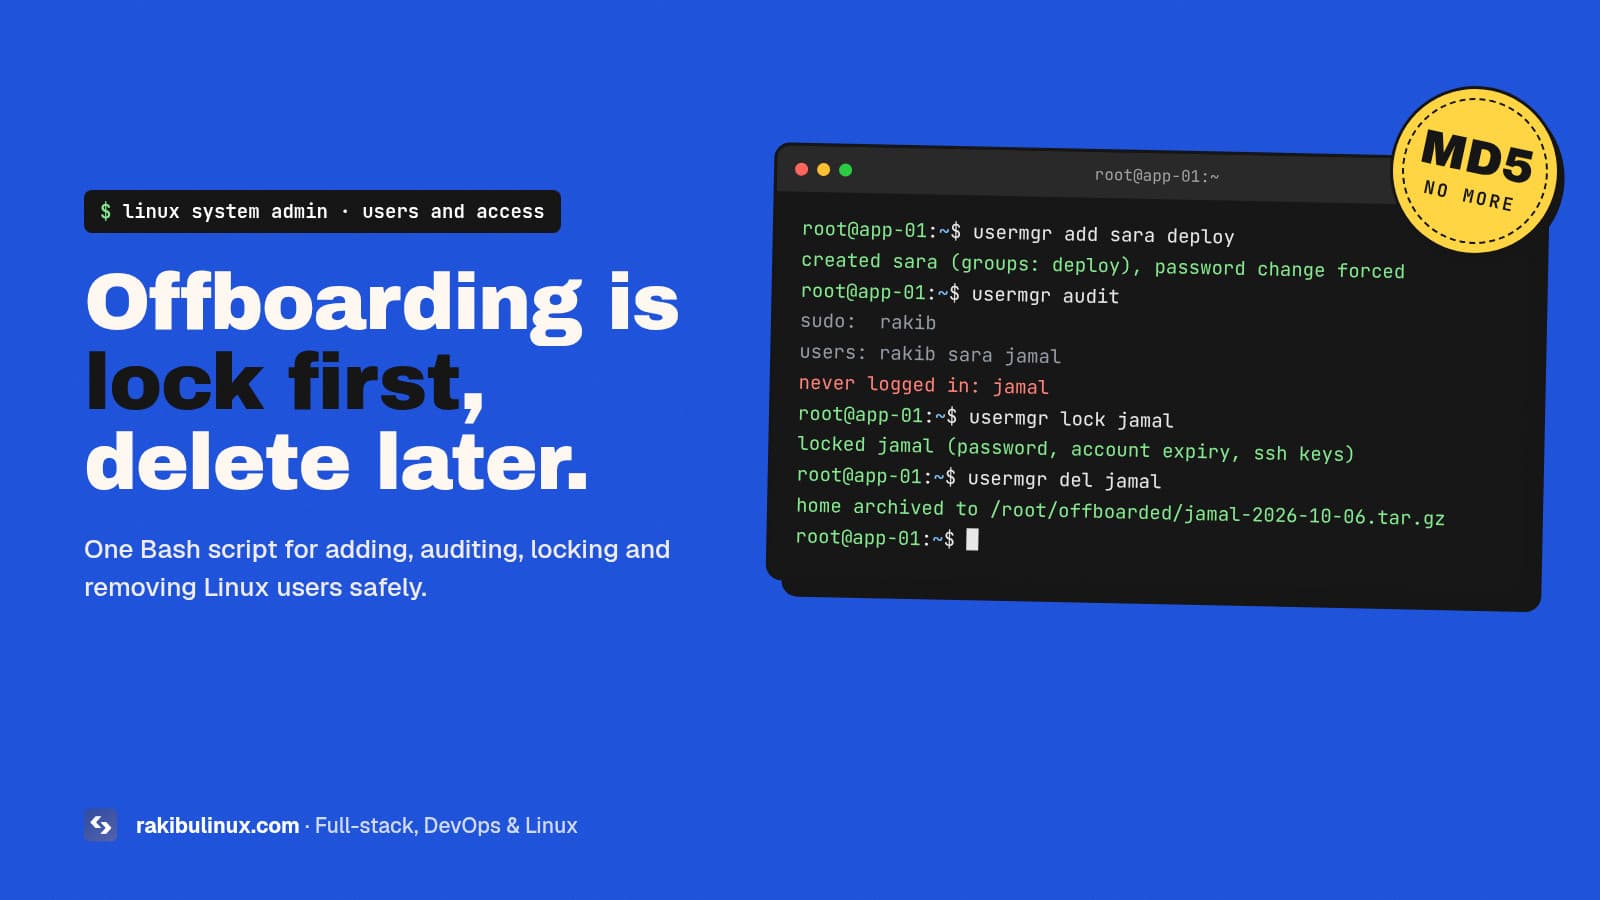
Linux User Management Script: Add, Lock, Delete Users
This Bash script adds, locks, deletes and audits Linux users safely: strong hashing via chpasswd, a forced first-login password change and archived homes. I published a user management script here in 2024, and a lot of people copied it. Looking at it again with the eyes of someone who now audits client servers, it had two real security problems: it hashed passwords with openssl passwd -1 (MD5-crypt, which is fast to crack), and it passed the hash on the command line, where any user can see it in ps . It also deleted users and their home folders immediately, with no way back. This is the rewritten version, with the same idea, one command for everyday account work, done the way I'd do it on a production server. Key takeaways Never hash passwords yourself. Pipe user:password into chpasswd , which uses the system default (yescrypt on current Ubuntu and Debian). Force a password change at first login with chage -d 0 , so you never know your users' real passwords. Offboard in two steps: lock the account and its SSH keys today, archive and delete it later. Audit regularly: who has sudo, who has never logged in, which accounts have SSH keys. Prefer SSH keys over passwords for anyone who logs in remotely. What should a user management script do? The everyday tasks on a team server are always the same: create an account for a new developer, give them the right groups, reset a password, see who has access, and remove someone who left. Doing those by hand with useradd , usermod and gpasswd works, but it's easy to forget a step, such as their SSH key or their sudo rights. A script makes the safe way the default way. The script Save it as /usr/local/sbin/usermgr and make it executable with sudo chmod 750 /usr/local/sbin/usermgr . It needs root. #!/usr/bin/env bash # usermgr: safe everyday Linux account management set -euo pipefail die() { echo "error: $*" >&2; exit 1; } [[ $EUID -eq 0 ]] || die "run as root (sudo usermgr ...)" valid() { [[ $1 =~ ^[a-z_][a-z0-9_-]{0,31}$ ]] || die "invalid name: $1"; } exists() { id "$1" &>/dev/null; } cmd=${1:-help}; shift || true case $cmd in add) # usermgr add NAME [group,group] [ssh-key-file] name=${1:?name}; groups=${2:-}; key=${3:-} valid "$name"; exists "$name" && die "$name already exists" useradd -m -s /bin/bash ${groups:+-G "$groups"} "$name" pass=$(openssl rand -base64 18) echo "$name:$pass" | chpasswd chage -d 0 "$name" if [[ -n $key ]]; then install -d -m 700 -o "$name" -g "$name" "/home/$name/.ssh" install -m 600 -o "$name" -g "$name" "$key" "/home/$name/.ssh/authorized_keys" fi echo "created $name (groups: ${groups:-none}), temporary password: $pass" echo "share it privately; it must be changed at first login" ;; reset) # usermgr reset NAME name=${1:?name}; exists "$name" || die "no user $name" pass=$(openssl rand -base64 18) echo "$name:$pass" | chpasswd chage -d 0 "$name" echo "new temporary password for $name: $pass" ;; group) # usermgr group GROUP user1,user2 group=${1:?group}; users=${2:?users} getent group "$group" >/dev/null || groupadd "$group" IFS=, read -ra list <<<"$users" for u in "${list[@]}"; do exists "$u" && usermod -aG "$group" "$u" && echo "added $u to $group"; done ;; lock) # usermgr lock NAME: disables password, account and SSH keys name=${1:?name}; exists "$name" || die "no user $name" usermod -L -e 1 "$name" keys=/home/$name/.ssh/authorized_keys [[ -f $keys ]] && mv "$keys" "$keys.disabled" pkill -KILL -u "$name" || true echo "locked $name" ;; unlock) name=${1:?name}; exists "$name" || die "no user $name" usermod -U -e "" "$name" keys=/home/$name/.ssh/authorized_keys [[ -f $keys.disabled ]] && mv "$keys.disabled" "$keys" echo "unlocked $name" ;; del) # usermgr del NAME: archive home, then remove name=${1:?name}; exists "$name" || die "no user $name" read -rp "Delete $name and archive /home/$name? Type the username to confirm: " ok [[ $ok == "$name" ]] || die "aborted" mkdir -p -m 700 /root/offboarded tar -czf "/root/offboarded/$name-$(date +%F).tar.gz" -C /home "$name" pkill -KILL -u "$name" || true userdel -r "$name" echo "deleted $name, home archived in /root/offboarded" ;; list) getent passwd | awk -F: '$3 >= 1000 && $3 < 65534 {printf "%-16s uid=%-6s %s\n", $1, $3, $7}' ;; audit) echo "sudo/admin: $(getent group sudo wheel | cut -d: -f4 | paste -sd, -)" for u in $(getent passwd | awk -F: '$3 >= 1000 && $3 < 65534 {print $1}'); do st=$(passwd -S "$u" | awk '{print $2}') key=no; [[ -s /home/$u/.ssh/authorized_keys ]] && key=yes seen=$(last -n 1 -w "$u" | awk 'NR==1 && NF {print $4, $5, $6, $7}') printf "%-16s status=%-2s ssh-key=%-3s last=%s\n" "$u" "$st" "$key" "${seen:-never}" done ;; *) echo "usage: usermgr add NAME [groups] [keyfile] | reset NAME | group GROUP u1,u2" echo " lock NAME | unlock NAME | del NAME | list | audit" ;; esac How each command works Add a user with groups and an SSH key sudo usermgr add sara deploy,www-data /tmp/sara.pub This creates sara with a home folder and Bash as her shell, adds her to the deploy and www-data groups, installs her public key with the right permissions ( 700 on .ssh , 600 on authorized_keys , owned by her), and sets a random temporary password she must change at first login. If she only logs in with her key, she'll be asked to set it the first time she uses sudo or a local console. Why chpasswd instead of openssl passwd The old script did useradd -p "$(openssl passwd -1 "$password")" . Two problems: -1 is MD5-crypt, a 1990s algorithm that modern GPUs crack quickly, and the resulting hash appears in the process list while useradd runs. chpasswd reads the password on standard input and hashes it with whatever ENCRYPT_METHOD your system uses in /etc/login.defs . On Ubuntu 22.04 and later that's yescrypt, a slow, memory-hard algorithm designed for passwords. Check yours with: grep ^ENCRYPT_METHOD /etc/login.defs sudo grep '^sara:' /etc/shadow | cut -d: -f2 | cut -c1-4 # $y$ = yescrypt, $6$ = SHA-512, $1$ = MD5 (bad) Any account whose hash starts with $1$ was set with the old method. Reset those passwords. Accounts move through four steps. Locking on the last day cuts access immediately, including SSH keys; deleting later, with the home folder archived, means nothing is lost if a file turns out to be needed. Lock before you delete When someone leaves, the urgent part is cutting access, not deleting files. usermgr lock does three things: usermod -L disables the password, -e 1 expires the account so key-based logins are refused too, and renaming authorized_keys makes that explicit. It also kills any running sessions. A common mistake I find on audits is a "removed" user whose password was locked but whose SSH key still works. A few weeks later, once you're sure nothing in their home folder is needed, usermgr del archives it to /root/offboarded and removes the account. It asks you to type the username to confirm, so a slip of the arrow key can't delete the wrong person. Audit who has access sudo usermgr audit This prints who is in the sudo (Ubuntu/Debian) or wheel (RHEL family) group, then each human account with its password status ( P usable, L locked, NP no password), whether it has an SSH key, and its last login. Accounts that never logged in, or haven't for months, are candidates for locking. I run this at the start of every server review. Good practices for Linux accounts One person, one account. Shared logins like admin or ubuntu make it impossible to know who did what. Give sudo sparingly. Use groups that own the specific folders (for example a deploy group for /srv/app ) instead of making everyone an admin. Turn off SSH password login once everyone has keys: PasswordAuthentication no in /etc/ssh/sshd_config . My Ubuntu 24.04 hardening checklist walks through it. Use service accounts for apps ( useradd --system --shell /usr/sbin/nologin app ) so a compromised app can't log in. Keep CI keys restricted. The GitHub Actions key that deploys this site can only run one command, via command="..." , restrict in authorized_keys . Details in CI/CD to a VPS with rollback . More scripts I use on servers are in Bash scripting for DevOps . Frequently asked questions What's the difference between useradd and adduser? useradd is the low-level tool available on every distribution and is best for scripts. adduser on Debian and Ubuntu is an interactive wrapper that asks questions and creates the home folder by default. Use useradd -m in scripts. How do I give a Linux user sudo access? Add them to the admin group: sudo usermod -aG sudo NAME on Ubuntu and Debian, or wheel on RHEL, Rocky and Alma. They need to log out and back in for it to apply. For narrower rights, add a file in /etc/sudoers.d/ with visudo -f . How do I disable a user without deleting it? Run sudo usermod -L -e 1 NAME to lock the password and expire the account, and move their ~/.ssh/authorized_keys aside. That blocks password and key logins while keeping their files. Is openssl passwd -1 secure for Linux passwords? No. -1 produces an MD5-crypt hash, which is far too fast to resist modern cracking. Let chpasswd or passwd hash passwords with the system default, which is yescrypt or SHA-512 on current distributions. How do I see all users on a Linux system? getent passwd lists every account, including system ones. Human accounts usually have a UID of 1000 or higher, so getent passwd | awk -F: '$3 >= 1000' filters them. Want an access review for your servers? I audit Linux servers for stale accounts, shared logins, weak password hashes, exposed SSH and over-broad sudo, then fix them and document who has access to what. See my Linux system admin services or book a server audit .
Read article →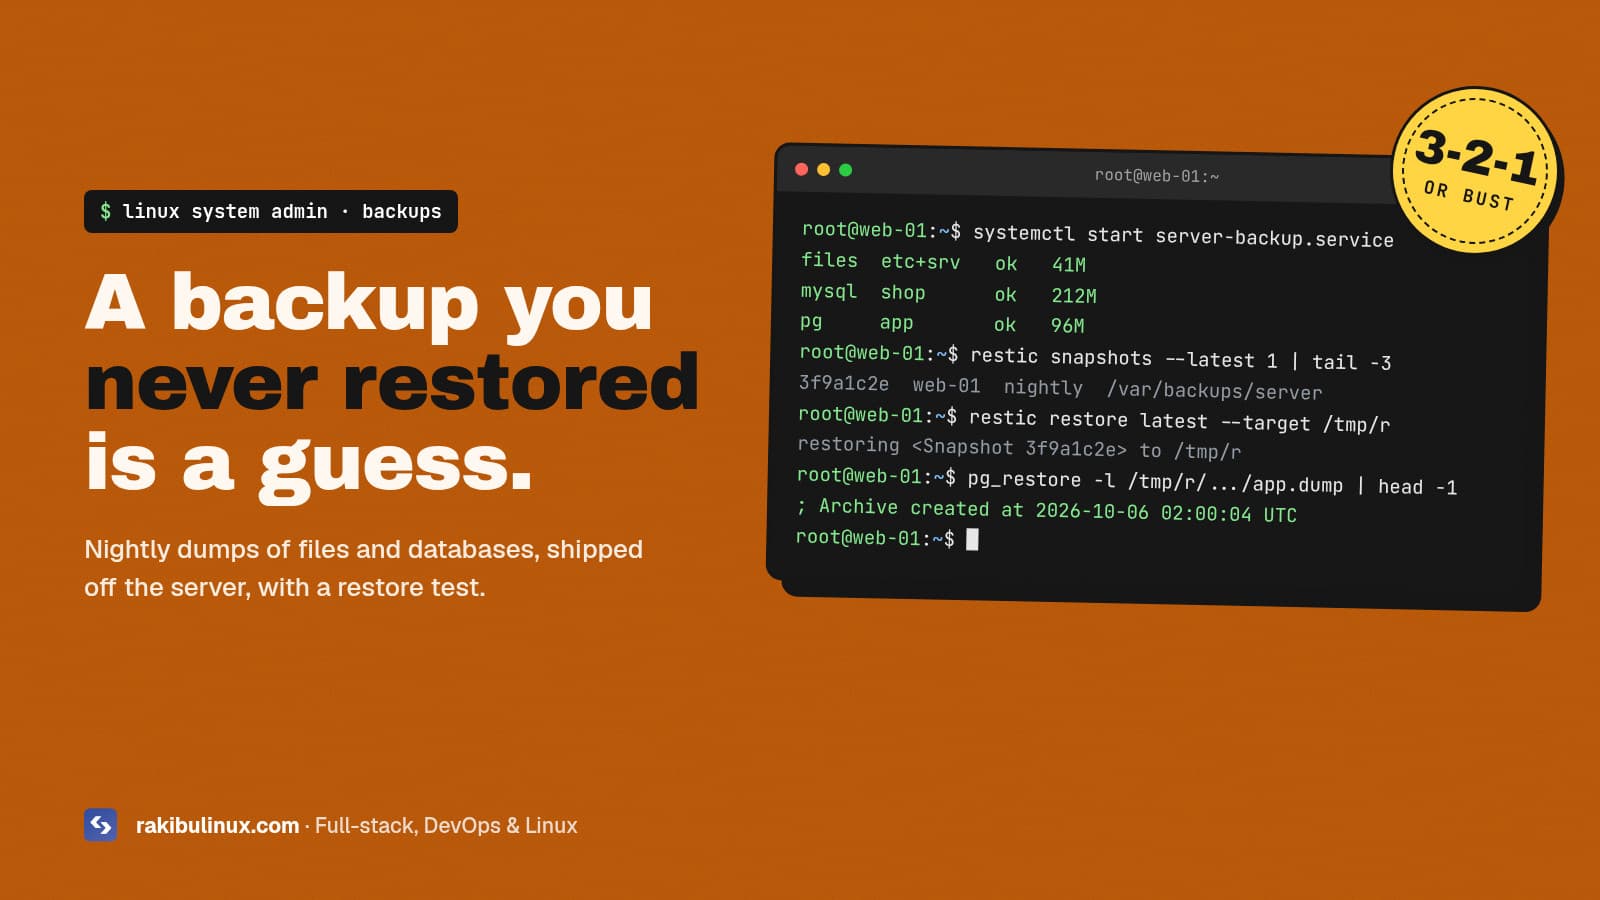
Linux Server Backup: Files, MySQL, Postgres, MongoDB
Back up a Linux server by dumping each database, archiving /etc and app files, running it nightly with a systemd timer, and copying it off-site with restic. I first published a backup script here in 2024. It worked, but it had the problems I now fix on client servers every month: passwords hard-coded in the script and visible in ps , backups stored on the same disk as the data, and no restore test. This is the rewritten version I use today. It covers files, MySQL or MariaDB, PostgreSQL and MongoDB, keeps credentials out of the script, ships everything off the server, and tells you when a night fails. Key takeaways Follow 3-2-1: three copies of your data, on two kinds of storage, one of them off the server. Dump databases, don't copy their files. Use mysqldump --single-transaction , pg_dump -Fc and mongodump --archive --gzip for consistent backups of a running database. Keep passwords out of scripts : use /root/.my.cnf , run Postgres tools as the postgres user, and lock files to mode 600. Schedule with a systemd timer and get alerted on failure, not just on success. Test a restore every month. Until you've restored it, you don't have a backup. What should you back up on a Linux server? Not the whole disk. You can reinstall Ubuntu and packages in minutes; what you can't recreate is your data and configuration. On a typical web server that means: Databases: every MySQL/MariaDB, PostgreSQL or MongoDB database, plus Postgres roles. Configuration: /etc (Nginx, systemd units, cron, SSH, firewall rules). Application data: uploads, .env files and anything under /srv or /var/www that isn't in git. TLS and keys if you can't simply reissue them: /etc/letsencrypt . A package list ( dpkg --get-selections ) so you can rebuild the same server. The 3-2-1 rule, in practice The script below writes local dumps to /var/backups/server on the server (copy one, fast to restore), then restic sends an encrypted, deduplicated copy to another machine or S3-compatible storage (copy two, off the server). Your live data is the third. If the server dies, is deleted by your provider, or gets ransomware, the off-site copy survives. Data is dumped to a local folder for fast restores, then copied encrypted off the server. The last step, a restore test, is the one that proves the backup is real. Step 1: Store database credentials safely The old version of this script had mysql_password="..." in it and passed it with -p , which shows up in the process list for any user on the box. Instead, put MySQL credentials in a file only root can read: sudo tee /root/.my.cnf >/dev/null <<'EOF' [client] user=backup password=use-a-long-random-password EOF sudo chmod 600 /root/.my.cnf Create a dedicated MySQL user with only the rights a dump needs: CREATE USER 'backup'@'localhost' IDENTIFIED BY 'use-a-long-random-password'; GRANT SELECT, SHOW VIEW, TRIGGER, EVENT, LOCK TABLES, PROCESS, RELOAD ON *.* TO 'backup'@'localhost'; PostgreSQL needs no password at all: run the dump tools as the postgres system user, which uses peer authentication on Ubuntu by default. Step 2: The backup script Save this as /usr/local/bin/server-backup . Delete the sections for databases you don't run. Each database is dumped to its own file, so you can restore one without touching the others. #!/usr/bin/env bash # Nightly server backup: config, app files and databases -> /var/backups/server set -euo pipefail umask 077 cd / # sudo -u postgres can't read root's cwd DEST=/var/backups/server STAMP=$(date +%F) KEEP_DAYS=7 PATHS=(/etc /srv /var/www) mkdir -p "$DEST"/{files,mysql,pg,mongo} log() { echo "[$(date +%T)] $*"; } log "files" tar -czf "$DEST/files/files-$STAMP.tar.gz" --ignore-failed-read "${PATHS[@]}" 2>/dev/null || [[ $? -eq 1 ]] dpkg --get-selections >"$DEST/files/packages-$STAMP.txt" if command -v mysqldump >/dev/null; then for db in $(mysql -NBe 'SHOW DATABASES' | grep -Ev '^(information_schema|performance_schema|sys)$'); do log "mysql $db" mysqldump --single-transaction --routines --triggers --events "$db" | gzip >"$DEST/mysql/$db-$STAMP.sql.gz" done fi if command -v pg_dump >/dev/null; then sudo -u postgres pg_dumpall --globals-only | gzip >"$DEST/pg/globals-$STAMP.sql.gz" for db in $(sudo -u postgres psql -Atc "SELECT datname FROM pg_database WHERE NOT datistemplate"); do log "pg $db" sudo -u postgres pg_dump -Fc "$db" >"$DEST/pg/$db-$STAMP.dump" done fi if command -v mongodump >/dev/null; then log "mongo" mongodump --quiet --archive="$DEST/mongo/mongo-$STAMP.archive.gz" --gzip fi find "$DEST" -type f -mtime +"$KEEP_DAYS" -delete log "done: $(du -sh "$DEST" | cut -f1)" sudo chmod 700 /usr/local/bin/server-backup sudo /usr/local/bin/server-backup A few details matter here. set -euo pipefail makes the script stop on the first failure, including a failed mysqldump inside a pipe, which the old version silently ignored. umask 077 keeps dumps readable only by root. --single-transaction gives a consistent snapshot of InnoDB tables without locking your site. On MariaDB the tools are also available as mariadb-dump and mariadb . The tar line tolerates files that change while being read (exit code 1) but still fails on real errors. Step 3: Run it nightly with a systemd timer Cron works, but a systemd timer logs every run to the journal, catches up after the server was off, and makes failure alerts easy. # /etc/systemd/system/server-backup.service [Unit] Description=Nightly server backup [Service] Type=oneshot Environment=HOME=/root ExecStart=/usr/local/bin/server-backup ExecStartPost=/usr/local/bin/offsite-backup Nice=10 IOSchedulingClass=idle # /etc/systemd/system/server-backup.timer [Unit] Description=Run server backup nightly [Timer] OnCalendar=*-*-* 02:00:00 RandomizedDelaySec=15m Persistent=true [Install] WantedBy=timers.target sudo systemctl daemon-reload sudo systemctl enable --now server-backup.timer systemctl list-timers server-backup.timer journalctl -u server-backup.service -n 50 Step 4: Copy it off the server with restic A backup on the same disk dies with the disk. restic encrypts, deduplicates and versions your backups, and it can write to another server over SFTP or to any S3-compatible bucket. Install it with sudo apt install restic , then create a password file and the repository once: sudo sh -c 'openssl rand -base64 32 > /root/.restic-pass && chmod 600 /root/.restic-pass' export RESTIC_REPOSITORY=sftp:backup@backup-host:/srv/restic/web-01 export RESTIC_PASSWORD_FILE=/root/.restic-pass sudo -E restic init Store a copy of that password somewhere else (a password manager). Without it the backups can't be decrypted, by you or anyone. Then save the off-site step as /usr/local/bin/offsite-backup : #!/usr/bin/env bash set -euo pipefail export RESTIC_REPOSITORY=sftp:backup@backup-host:/srv/restic/web-01 export RESTIC_PASSWORD_FILE=/root/.restic-pass restic backup /var/backups/server --tag nightly restic forget --keep-daily 7 --keep-weekly 4 --keep-monthly 6 --prune restic check --read-data-subset=5% If you use object storage, set RESTIC_REPOSITORY=s3:https://endpoint/bucket with AWS_ACCESS_KEY_ID and AWS_SECRET_ACCESS_KEY . I compared self-hosted S3 options in MinIO is archived: self-hosted S3 alternatives . Give the backup credentials write access only to that one bucket. Step 5: Get alerted when a backup fails Silent failures are how teams discover, during an outage, that the last good backup is from March. Add an OnFailure= unit that emails or posts to Slack, or use a "dead man's switch" monitor: the script pings a URL on success, and the service alerts you when the ping doesn't arrive. Add one line at the end of offsite-backup : curl -fsS -m 10 --retry 3 https://your-monitor.example/ping/BACKUP-CHECK-ID >/dev/null Step 6: Test a restore (monthly) Pick a date in your calendar. Restore the latest snapshot into a temporary folder and load one database into a scratch instance: sudo -E restic restore latest --target /tmp/restore ls -lh /tmp/restore/var/backups/server/pg/ # PostgreSQL: restore into a new database and count rows sudo -u postgres createdb restore_test sudo -u postgres pg_restore -d restore_test /tmp/restore/var/backups/server/pg/app-2026-10-06.dump sudo -u postgres psql -d restore_test -c 'SELECT count(*) FROM "User";' # MySQL zcat /tmp/restore/var/backups/server/mysql/shop-2026-10-06.sql.gz | mysql shop_restore_test # MongoDB mongorestore --archive=/tmp/restore/var/backups/server/mongo/mongo-2026-10-06.archive.gz --gzip --dryRun Time the restore and write the number down. That's your real recovery time, and it's what you tell a client when they ask how long an outage would last. Common backup mistakes Copying /var/lib/mysql while MySQL runs. The files are inconsistent; use a dump or a filesystem snapshot. Only provider snapshots. They're useful, but they live in the same account. If the account is locked or compromised, they go too. Off-site storage the server can delete. Ransomware with root can wipe it. Use append-only credentials or object lock where available. Backing up before deploys only by hand. Automate it. My deploy script runs pg_dump -Fc before every migration; see CI/CD with automatic rollback . Backups are one part of a safe server. My Ubuntu 24.04 hardening checklist covers SSH, firewalls and updates, and the Bash scripts for DevOps post has more of the scripts I run on every server. Frequently asked questions How often should I back up a Linux server? Nightly is right for most websites and small business apps. If losing a day of orders or sign-ups is unacceptable, add PostgreSQL WAL archiving or MySQL binary logs for point-in-time recovery, or run dumps every few hours. Is rsync a backup? Not on its own. rsync mirrors the current state, so a deleted or encrypted file is mirrored too. Tools like restic or Borg keep versions, so you can go back to last Tuesday. Should I use cron or a systemd timer? Either works. A systemd timer gives you logs in the journal, runs missed jobs after downtime with Persistent=true , and can trigger an alert unit on failure, so I use timers on new servers. Where should I store off-site backups? Somewhere with a different provider or account from the server: a second VPS, a storage box, or S3-compatible object storage. Keep the encryption password in a password manager, not only on the server. How long should I keep backups? A common policy is 7 daily, 4 weekly and 6 monthly snapshots. Legal or contract requirements may need longer. Deduplication in restic keeps the storage cost low. Need backups set up properly? I set up automated, encrypted, off-site backups for Linux servers, with alerts and a documented restore test, and fix the ones that quietly stopped working. See my Linux system admin services or ask for a backup review .
Read article →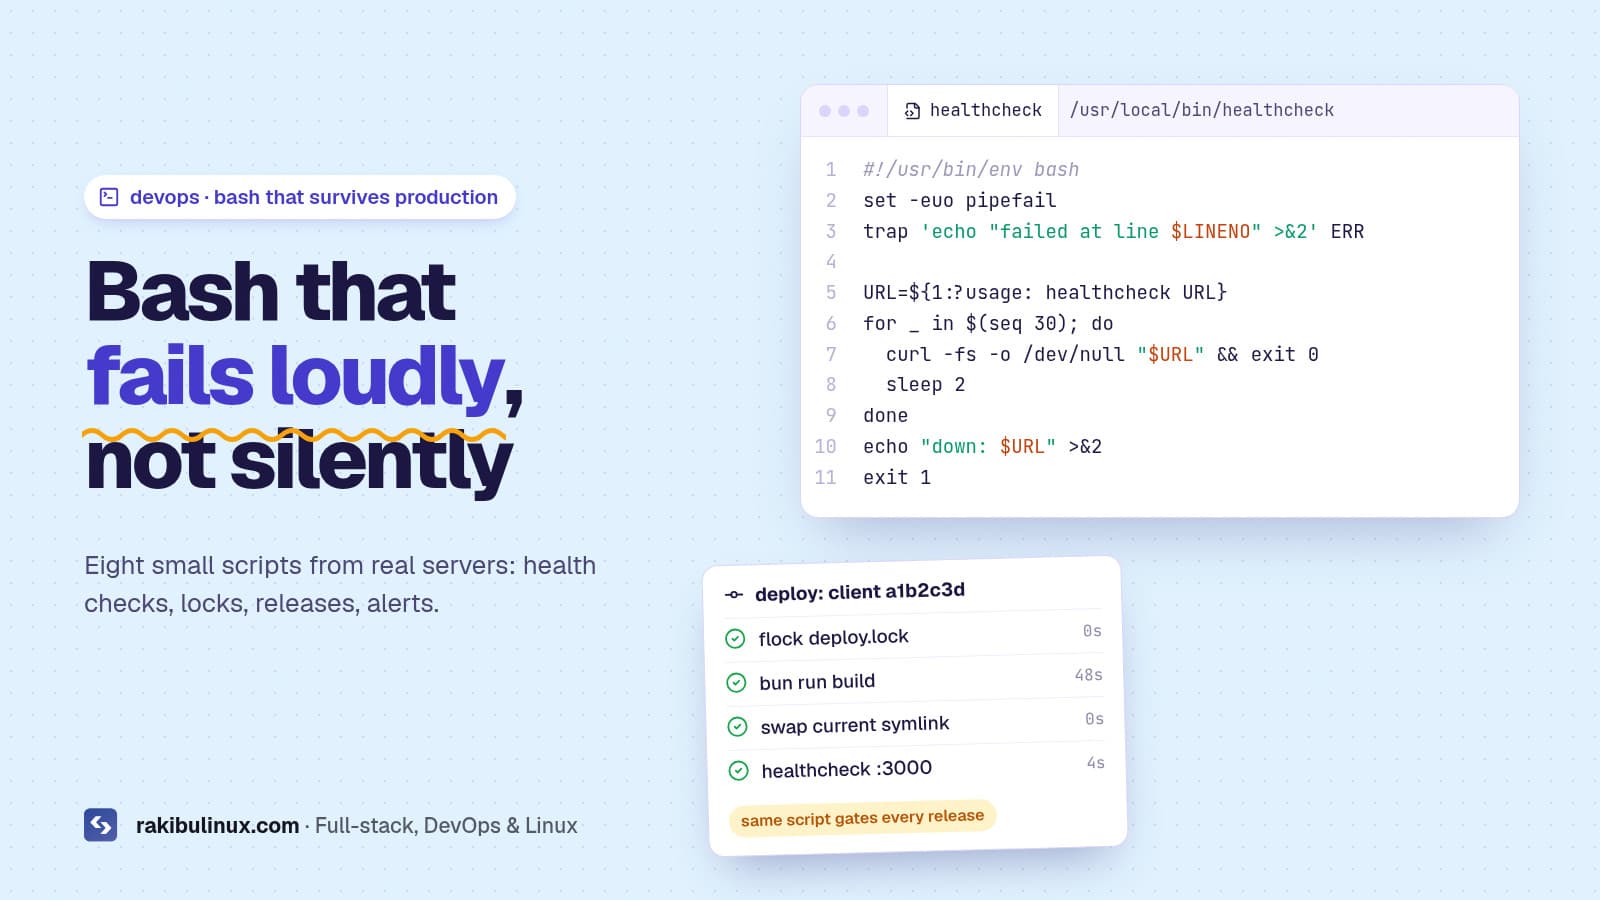
Bash Scripting for DevOps: 8 Scripts I Use on Servers
Bash scripting for DevOps means small, strict scripts that automate deploys, checks and alerts. Start each with set -euo pipefail and lint it with shellcheck. When I first wrote about shell scripting here, I showed "Hello, World" and a loop that counts to five. That's how everyone learns, but it isn't what Bash is used for on a real server. This rewrite shows the scripts I actually run in production, including pieces of the deploy script that ships this website on every push. Each one is short, does one job, and fails loudly instead of silently. Key takeaways Use strict mode: set -euo pipefail stops a script at the first error, unset variable or failed pipe. Quote every variable ( "$file" , not $file ), or file names with spaces will break things. Lock jobs that must not overlap with flock , and swap releases atomically with ln -sfn + mv -T . Run shellcheck on every script; it catches most Bash bugs before they reach a server. Switch to Python when a script needs JSON parsing, complex data or grows past a couple of hundred lines. Why Bash still matters in DevOps Every Linux server already has Bash. There's nothing to install, and it's the native language of the tools you glue together: git , curl , systemctl , pg_dump , rsync . GitHub Actions steps, Dockerfile RUN lines, cron jobs and systemd units all end up running shell commands. Knowing how to write a safe script is a core DevOps skill, even on teams that use Terraform and Kubernetes. 1. A safe script template Every script I write starts like this: #!/usr/bin/env bash set -euo pipefail trap 'echo "[$(date +%T)] failed at line $LINENO (exit $?)" >&2' ERR log() { echo "[$(date +%T)] $*"; } die() { echo "error: $*" >&2; exit 1; } [[ $EUID -eq 0 ]] || die "run as root" TARGET=${1:?usage: $0 <target>} log "starting for $TARGET" -e exits when a command fails. -u treats unset variables as errors, so a typo in $BACKUP_DRI doesn't become rm -rf / . -o pipefail makes cmd | gzip fail when cmd fails. The ERR trap prints the line that failed, which turns a mystery into a one-minute fix. ${1:?message} stops with a usage message when an argument is missing. With strict mode, a failed pg_dump inside a pipe stops the script at line 3. Without it, the script would carry on, delete the old backups and print "done" over an empty file. 2. Website health check with retries This is the check my deploy script runs after every release. It waits up to a minute for the app to answer, then fails so the deploy can roll back: #!/usr/bin/env bash set -euo pipefail URL=${1:?usage: healthcheck URL} for _ in $(seq 30); do curl -fs -o /dev/null --max-time 5 "$URL" && { echo "up: $URL"; exit 0; } sleep 2 done echo "down: $URL" >&2 exit 1 curl -f turns HTTP 4xx and 5xx responses into a non-zero exit code, which is what makes it usable in scripts. The full deploy flow is in GitHub Actions CI/CD with automatic rollback . 3. Disk space alert Full disks are one of the most common causes of outages I'm called in to fix: logs or Docker images fill the root partition and the database stops writing. #!/usr/bin/env bash set -euo pipefail LIMIT=${1:-85} df -P -x tmpfs -x devtmpfs -x overlay -x squashfs -x efivarfs | awk 'NR>1 {print $5, $6}' | while read -r used mount; do pct=${used%\%} if (( pct >= LIMIT )); then echo "$(hostname): $mount is ${pct}% full" | logger -t disk-alert -s fi done Run it every 15 minutes with cron or a systemd timer, and point the output to email, Slack or your monitoring tool. To find what's eating the space: sudo du -xh / --max-depth=2 | sort -h | tail -20 , journalctl --disk-usage and docker system df . 4. SSL certificate expiry check Certbot renews automatically, until a DNS change or a broken Nginx config makes renewal fail quietly. This warns you two weeks ahead: #!/usr/bin/env bash set -euo pipefail DAYS=14 for host in "$@"; do end=$(echo | openssl s_client -connect "$host:443" -servername "$host" 2>/dev/null | openssl x509 -noout -enddate | cut -d= -f2) left=$(( ( $(date -d "$end" +%s) - $(date +%s) ) / 86400 )) if (( left < DAYS )); then echo "WARN $host expires in $left days ($end)" else echo "ok $host $left days" fi done ./ssl-check www.example.com api.example.com 5. Prevent overlapping runs with flock If a cron job takes longer than its interval, two copies run at once and fight over the same files. My deploy script uses flock so two pushes in a row never build at the same time: exec 9>/var/lock/deploy.lock flock 9 # wait for the other run to finish # flock -n 9 || exit 0 # or: skip this run if one is already going The lock is released automatically when the script exits, even if it crashes. 6. Atomic release switch with symlinks Deploying by overwriting files in place means visitors hit a half-updated app. Instead, build each release in its own folder and point a current symlink at it. Swapping the link is a single rename, so it's atomic: switch_to() { ln -sfn "$1" "$BASE/current.new" mv -T "$BASE/current.new" "$BASE/current" } PREV=$(readlink -e "$BASE/current" || true) switch_to "$BASE/releases/$RELEASE" healthcheck http://127.0.0.1:3000/ || { switch_to "$PREV"; exit 1; } Rollback is the same function pointed at the previous folder. This pattern is the heart of zero-downtime deploys in my Next.js on a VPS guide . 7. Keep only the newest N files Releases, logs and backups pile up until the disk is full. This keeps the newest five release folders and deletes the rest: ls -1d "$BASE"/releases/*/ | sort -r | tail -n +6 | xargs -r rm -rf It works because the folder names start with a UTC timestamp ( 20261006093000-a1b2c3d ), so sorting by name is sorting by date. xargs -r does nothing when there's nothing to delete. For date-based cleanup, use find "$DIR" -type f -mtime +7 -delete , as in my Linux backup script . 8. Find what's causing 5xx errors in Nginx logs When a client says "the site is throwing errors", this is usually the first command I run: #!/usr/bin/env bash set -euo pipefail LOG=${1:-/var/log/nginx/access.log} echo "== 5xx by status" awk '$9 ~ /^5/ {print $9}' "$LOG" | sort | uniq -c | sort -rn echo "== top 10 failing URLs" awk '$9 ~ /^5/ {print $7}' "$LOG" | sort | uniq -c | sort -rn | head -10 echo "== last 5" awk '$9 ~ /^5/' "$LOG" | tail -5 It assumes Nginx's default combined log format, where field 9 is the status and field 7 the path. A 502 means Nginx couldn't reach your app (it crashed or is listening on a different port); a 504 means the app was too slow to answer. Lint every script with shellcheck shellcheck finds unquoted variables, useless cat s, broken conditions and dozens of other mistakes. Install it with sudo apt install shellcheck and run it in CI so bad scripts never get merged: shellcheck scripts/*.sh bash -n scripts/deploy.sh # syntax check only When not to use Bash Bash is great for gluing commands together, and painful for everything else. I switch to Python or TypeScript when a script needs to parse JSON beyond a quick jq call, handle complex data structures, call APIs with retries and pagination, or when it passes about 200 lines. Configuration of many servers belongs in Ansible or similar, not in a loop over SSH. For managing users and permissions, see my Linux user management script , and for the server baseline these scripts run on, the Ubuntu 24.04 hardening checklist . Frequently asked questions Is Bash scripting still useful for DevOps in 2026? Yes. CI pipelines, Dockerfiles, cron jobs and deploy hooks all run shell commands, and most server troubleshooting happens in a shell. Bash is the glue even when Terraform or Kubernetes manage the bigger picture. What does set -euo pipefail do? It makes Bash stop on the first failed command ( -e ), treat unset variables as errors ( -u ), and fail a pipeline when any command in it fails ( -o pipefail ). Together they stop a broken script before it does damage. Should I use #!/bin/bash or #!/usr/bin/env bash? Both work on Linux. #!/usr/bin/env bash finds Bash on the PATH , which is more portable to macOS and BSD. Use #!/bin/sh only if you write strictly POSIX shell without Bash features. How do I run a Bash script on a schedule? Use cron ( crontab -e ) for simple jobs, or a systemd service plus timer for logging, retries and failure alerts. Always use absolute paths in scheduled scripts, since the environment is minimal. What's the best way to learn shell scripting for DevOps? Automate one real task you do by hand, such as a deploy, a backup or a log check. Run shellcheck on it, read its warnings, and keep improving the script as it breaks. Real problems teach faster than exercises. Need servers automated? I write deploy scripts, health checks, backups and alerting for Linux servers, and set up CI/CD so they run on every push. See my DevOps services or send me the task you'd like automated .
Read article →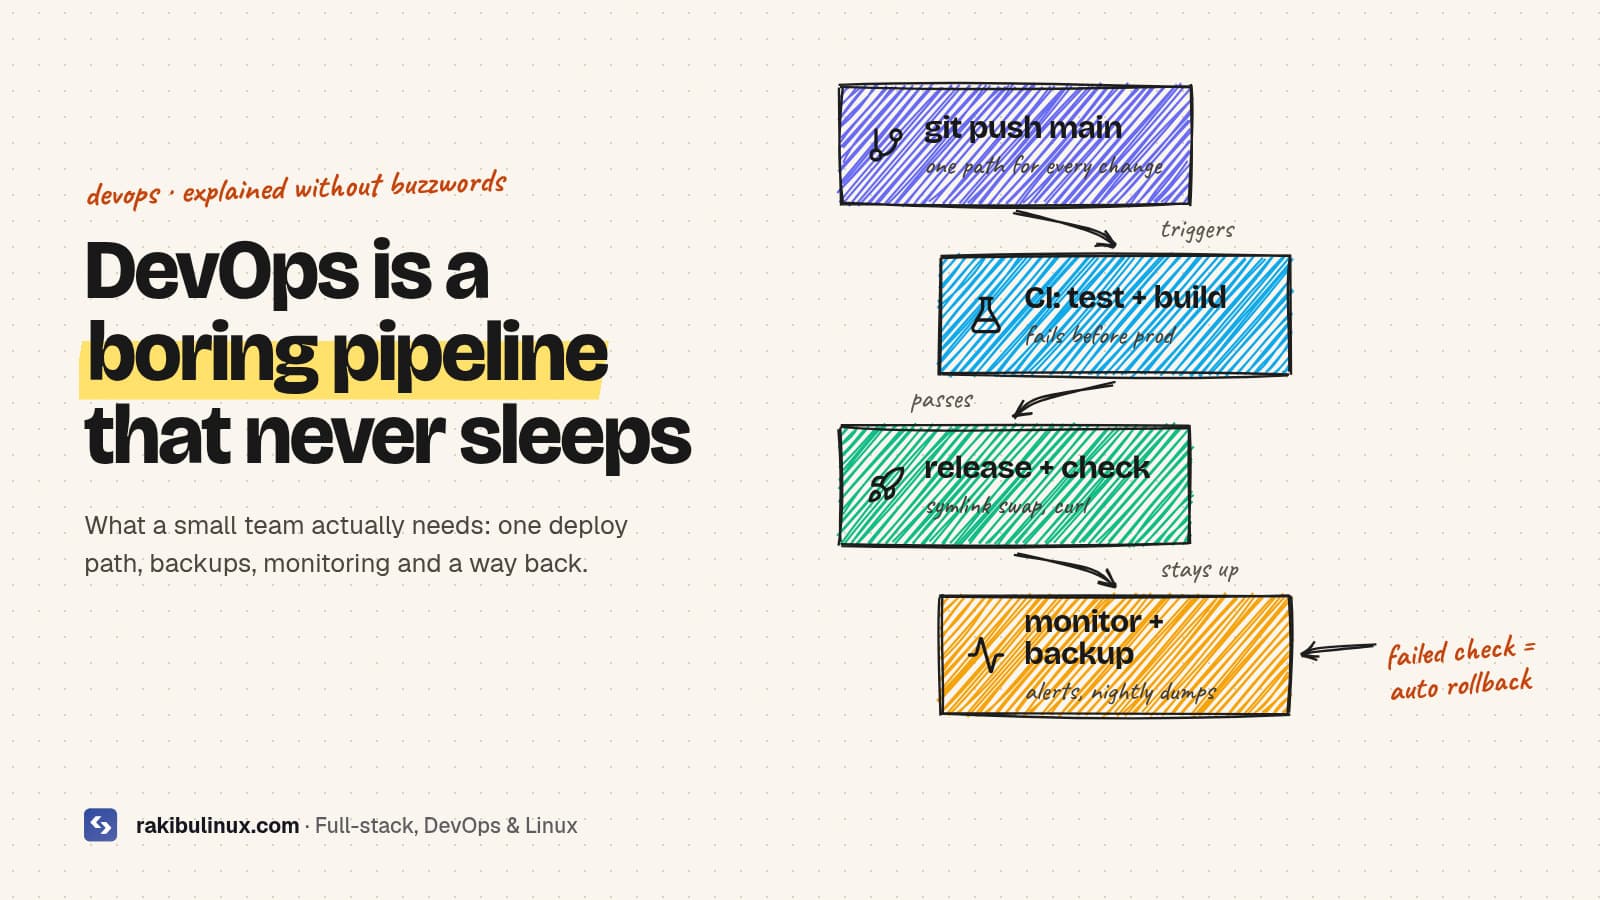
What Is DevOps? A Practical Guide for Small Teams
DevOps is how a team ships software often and safely: automated tests, one-click deploys, monitoring and fast rollback, owned by the people who build it. Most explanations of DevOps stop at "culture" and "collaboration". That's true, but it doesn't help a founder with one server and a deadline, or a small team where deploys mean SSH, git pull and hoping. I set up and run DevOps for small teams and for my own products. This site deploys itself on every push to main , with a database backup, a health check and an automatic rollback. This guide covers what DevOps means in practice, what to set up first, and when it's worth bringing in help. Key takeaways DevOps is a way of working, not a job title or a tool. The same team builds, ships and runs the software, and automates the boring parts. The core loop is short: commit, automated tests, automated deploy, health check, monitoring, learn, repeat. Start with four things: a CI pipeline, a scripted deploy with rollback, backups you've restored at least once, and uptime alerts. Measure it with the four DORA metrics: deployment frequency, lead time for changes, change failure rate and time to recover. Small teams don't need Kubernetes. One well-run VPS with a good pipeline beats a cluster nobody understands. What does DevOps mean in plain English? Before DevOps, developers wrote code and "threw it over the wall" to an operations team that deployed and ran it. When something broke, each side blamed the other, releases were rare and scary, and fixing a bug in production could take weeks. DevOps removes the wall. The people who write a feature are responsible for getting it to production and keeping it healthy there. To make that possible without burning out, they automate everything repeatable: testing, building, deploying, provisioning servers, backups and alerts. The result is small changes shipped often, each one easy to check and easy to undo. So when someone asks "what is DevOps?", the honest short answer is: automation plus ownership . Tools like GitHub Actions, Docker, Terraform or Ansible are how you do it, not what it is. What does a DevOps pipeline look like? Here's the real pipeline behind this website, which is a Next.js front end and a NestJS API on one Ubuntu server: Push to main . GitHub Actions starts a job. CI checks. Install dependencies with a frozen lockfile, type-check, run tests, build. A failure stops here and production is untouched. Deploy over SSH. The Actions key can only run one deploy command, nothing else. Build a new release folder while the old version keeps serving traffic. Back up the database, run migrations, swap a symlink, restart the process. Health check. If /health doesn't answer within about 90 seconds, the symlink is swapped back to the previous release automatically. Every change takes the same automated path. A broken test stops it before production; a failed health check after deploy puts the previous release back without anyone logging in. None of this needs a big platform. It's a GitHub Actions workflow and a Bash deploy script of about 150 lines. I wrote up the full setup in GitHub Actions CI/CD to a VPS with automatic rollback . The DevOps practices that matter most Continuous integration (CI) Every push is built and tested automatically on a clean machine. "Works on my laptop" stops being an argument, and broken code is caught minutes after it's written instead of days later. Continuous delivery and deployment (CD) Deploying is one command or one merge, and it's the same every time. When deploys are boring, you do them more often, so each one is smaller and safer. The opposite, a big monthly release, is where most outages come from. Infrastructure as code (IaC) Servers, DNS, firewalls and databases are described in files (Terraform, Ansible, Docker Compose, or even a well-commented shell script) and kept in git. You can rebuild a server from scratch, review infrastructure changes like code, and see who changed what. Monitoring, logging and alerts You should hear about a problem from an alert, not from a customer. At minimum: uptime checks from outside, disk and memory alerts, error logs you can search, and SSL expiry warnings. Backups and recovery Backups are part of DevOps, not an afterthought. My deploy script dumps the database before every migration, and nightly backups go off the server. The step most teams skip is testing a restore. My Linux server backup guide covers it. Security built in Hardened SSH, a firewall, automatic security updates, secrets outside the repo and dependency checks in CI. My Ubuntu 24.04 hardening checklist is the baseline I apply to every server. How do you measure DevOps? The DORA metrics Google's DORA research program has tracked thousands of teams for years and settled on four metrics that predict delivery performance: Deployment frequency: how often you ship to production. Lead time for changes: how long from commit to running in production. Change failure rate: what share of deploys cause a problem that needs a fix or rollback. Time to restore service: how fast you recover when a deploy goes wrong. You don't need a dashboard to start. Write the four numbers down today, and check them again after a month of changes. If deploys went from "every two weeks, takes an afternoon" to "several times a day, takes five minutes", it's working. What should a small team set up first? If you're starting from manual deploys, this is the order I'd follow. Each step pays for itself before the next one: Put everything in git , including server config and deploy scripts. No secrets in the repo. Add CI that installs, type-checks, tests and builds on every push. Script the deploy with release folders and a health check, so rollback is one command (then make it automatic). Set up backups that leave the server, and restore one to prove it works. Add monitoring: an external uptime check and alerts for disk, memory and certificate expiry. Harden the server and keep it patched. Only then consider containers, staging environments or infrastructure as code with Terraform. Skipping straight to Kubernetes is the most common mistake I see. It solves problems small teams don't have yet and adds a lot of moving parts. A single VPS also costs far less than most managed platforms, as I worked out in Vercel vs self-hosting costs . Is DevOps a role or a culture? Both, and the confusion is fair. The original idea is cultural: shared ownership between development and operations. In practice, companies also hire "DevOps engineers" to build the pipelines, infrastructure and monitoring that make that ownership possible. For a small company, that's often a freelancer who sets everything up, documents it, and hands it over so the developers can run it day to day. Signs you need DevOps help Deploys are manual, and only one person knows how to do them. You've had an outage and couldn't tell what changed. You don't know when your last working backup was taken. The server hasn't been updated in months, or you're not sure who has SSH access. Your hosting bill keeps growing and nobody knows why. Frequently asked questions What is DevOps in simple words? DevOps is a way of building software where the same team develops, deploys and runs it, and automates testing, deployment and monitoring. The goal is to release small changes often, with less risk. What tools are used in DevOps? Common ones are Git and GitHub Actions or GitLab CI for pipelines, Docker for packaging, Terraform or Ansible for infrastructure as code, Nginx, and Prometheus, Grafana or an uptime service for monitoring. The tools matter less than automating the same path every time. Does a small business need DevOps? Yes, at a small scale. A CI pipeline, a scripted deploy with rollback, tested backups and uptime alerts take a few days to set up and prevent the outages and lost data that hurt small businesses most. Is DevOps the same as CI/CD? No. CI/CD is one practice inside DevOps. DevOps also covers infrastructure as code, monitoring, incident response, security and the shared ownership that ties them together. How long does it take to set up a DevOps pipeline? For a typical web app on a VPS, a working CI pipeline with automated deploys and rollback takes a few days. Monitoring, backups and hardening add a few more. Larger systems with several services take longer. Want this set up for your project? I build CI/CD pipelines, deploy scripts with automatic rollback, backups and monitoring for small teams, and document everything so you can run it yourself. See my DevOps services or tell me about your setup .
Read article →
My New Work Station: Embracing the Heights of Productivity with a Standing Desk
Introduction: Welcome to the unveiling of my revamped workspace! In the pursuit of a healthier and more productive work environment, I recently made a significant upgrade – I embraced the world of standing desks. Join me as I share my journey into the realm of ergonomic bliss and discover how this change has positively impacted my daily work routine. The Decision to Stand: For many of us, the sedentary nature of desk jobs can take a toll on both physical and mental well-being. The idea of a standing desk began to intrigue me as I sought a solution to combat the notorious slouch and fatigue that often accompany long hours at a traditional desk. The decision to stand while working not only promised increased energy levels but also hinted at a healthier posture and improved focus. Setting Up the Standing Desk: The excitement of receiving and assembling my new standing desk was palpable. As each piece came together, I envisioned a workspace that would not only elevate my computer but also lift my productivity to new heights. The adjustable features of the desk allowed me to find the perfect height, ensuring a comfortable and customized experience. The Impact on Productivity: The transition to a standing desk brought about a noticeable shift in my daily work routine. While the physical benefits were evident – reduced back pain, increased circulation, and improved posture – the impact on productivity was equally profound. Standing while working encouraged better concentration, minimized distractions, and infused a renewed sense of alertness into my tasks. Ergonomics and Comfort: One of my initial concerns was whether standing for extended periods would lead to discomfort. However, with the right ergonomic setup, including an anti-fatigue mat and proper footwear, my fears were quickly dispelled. The standing desk's adaptability allowed me to seamlessly switch between sitting and standing, striking the perfect balance between comfort and health. Tips and Tricks for Standing Desk Success: In my exploration of the standing desk lifestyle, I've gathered some invaluable tips and tricks. From incorporating short breaks to stretch and move around to investing in a supportive anti-fatigue mat, these insights have contributed to making the standing desk experience not just beneficial but enjoyable. The Standing Desk Chronicles: Follow me on this blog series, 'The Standing Desk Chronicles,' where I'll share updates on my journey, delve into the latest ergonomic trends, and explore the broader landscape of creating a workspace that nurtures both productivity and well-being. Conclusion: My new workstation – the standing desk – has truly been a game-changer. It's not just about standing; it's about elevating my work experience, quite literally. Join me in this ongoing adventure as we explore the heights of productivity, one standing desk at a time. Welcome to 'My New Work Station: The Standing Desk Chronicles.' Stand tall, work smart!
Read article →