Skip to content
All articles
Oct 5, 20269 min read

MinIO Is Archived: Self-Hosted S3 Alternatives in 2026
MinIO Is Archived: Self-Hosted S3 Alternatives in 2026

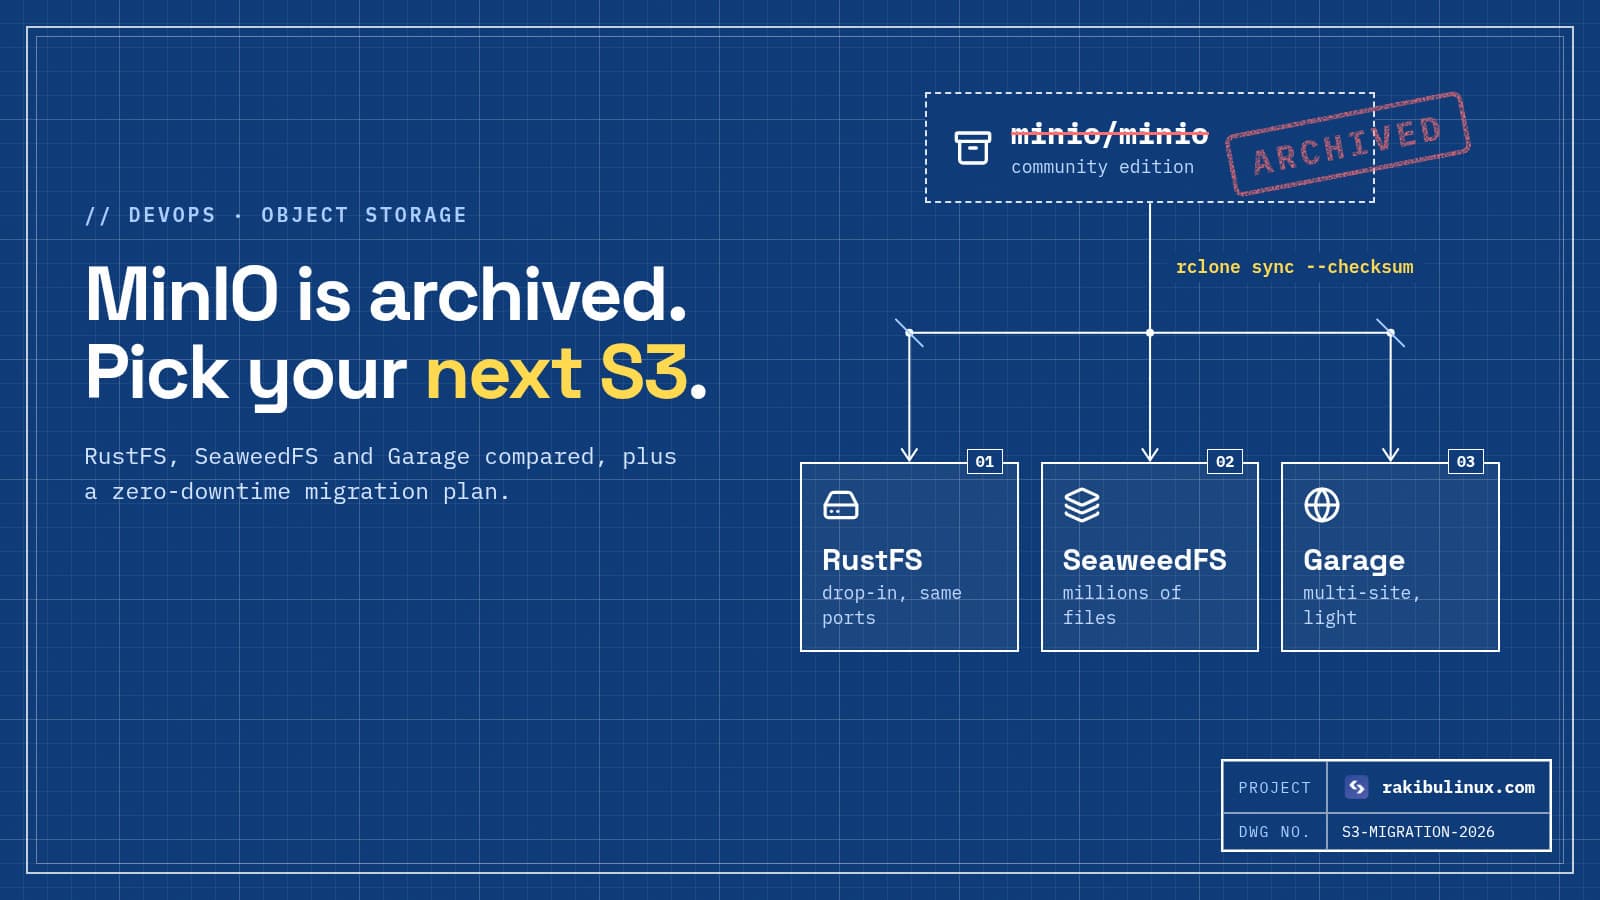
MinIO's open-source repo is archived. For self-hosted S3 in 2026, use RustFS as a drop-in, SeaweedFS for proven scale, or Garage for small multi-site clusters.

For years, MinIO was the answer to "how do I run S3 on my own server?" That is no longer true. Over 2025 the company removed most of the web console from the community edition, stopped publishing free binaries and Docker images, and moved the open-source project into maintenance mode. In April 2026 the GitHub repository was archived. If your app still stores uploads, backups or build artifacts in a community MinIO instance, you are running unmaintained storage software, and it is time to plan a move.

I went through this migration myself. The uploads for this website (blog covers, project screenshots, chat attachments) used to live on local disk and in MinIO-style storage. Today they live in RustFS, with a local-disk fallback for older files. This guide covers what I learned: which alternatives are worth your time, how to choose, and how to migrate without breaking a single image URL.

Key takeaways

  • MinIO community edition is no longer a safe default. No new security fixes means every exposed instance becomes riskier over time.
  • RustFS is the closest MinIO look-alike: same single-binary model, same ports (9000 API, 9001 console), Apache 2.0 license.
  • SeaweedFS is the mature, battle-tested choice when you have lots of files or need to grow to many servers.
  • Garage is great for small clusters spread across locations, but implements only the core S3 API.
  • Migration is mostly boring if your app talks plain S3: copy buckets with rclone, switch the endpoint, keep the same object keys.

Why the MinIO change matters for your business

Object storage is rarely the exciting part of a product, which is exactly why it gets forgotten. It quietly holds customer uploads, invoices, database backups and media. When the software underneath stops getting patches, three things happen:

  1. Security debt grows. Any vulnerability found after the archive date stays open in the community build.
  2. Docker images go stale. If you pull minio/minio:latest in CI, you may already be pinned to an old build without noticing.
  3. Hiring and support get harder. New engineers will expect a maintained tool, and documentation will slowly drift away from the version you run.

The good news: S3 is a protocol, not a product. Your application code almost never needs to change. You swap the server behind the endpoint.

The best self-hosted S3 alternatives in 2026

1. RustFS: the drop-in replacement

RustFS is written in Rust, licensed under Apache 2.0, and openly aims to fill the space MinIO left. It ships as a single binary or Docker image, exposes the S3 API on port 9000 and a web console on port 9001, and the console will feel familiar to anyone who used the old MinIO UI.

docker run -d --name rustfs \
  -p 127.0.0.1:9000:9000 -p 127.0.0.1:9001:9001 \
  -e RUSTFS_ACCESS_KEY=change-me \
  -e RUSTFS_SECRET_KEY=a-long-random-secret \
  -v /srv/rustfs/data:/data \
  -v /srv/rustfs/logs:/logs \
  --restart unless-stopped \
  rustfs/rustfs:latest

Notice the 127.0.0.1 bindings. Docker publishes ports straight through iptables and bypasses UFW, so I never expose storage ports publicly. Put Nginx in front with TLS instead (for example s3.yourdomain.com), and never keep the default rustfsadmin credentials.

Choose RustFS when: you ran a single MinIO node, you want the shortest migration, and you like having a web console. Be careful: it is a younger project, so pin a version tag in production and test upgrades on staging first.

2. SeaweedFS: proven at scale

SeaweedFS has been in development for over a decade. It is built for very large numbers of files, stores small objects efficiently, and offers an S3 gateway on top of its own filer. It is Apache 2.0 licensed and has a long production track record.

Choose SeaweedFS when: you store millions of files, you expect to grow beyond one server, or you need features like tiering to cloud storage. Trade-off: more moving parts (master, volume, filer, S3 gateway) and a steeper learning curve than a single binary.

3. Garage: lightweight and geo-distributed

Garage was designed by the Deuxfleurs collective to run on modest hardware across several physical locations, with replication built in. It is light on RAM and simple to operate. It is licensed under AGPL-3.0, which is fine for running it as infrastructure, but worth a quick check with your legal team if you plan to modify and distribute it.

Choose Garage when: you want three small nodes in three places (home lab, office, VPS) instead of one big server. Trade-off: it implements the core S3 API, not every advanced feature, so check that your SDK calls (versioning, object lock, some ACL operations) are supported before you commit.

4. Ceph RGW: enterprise only

Ceph's RADOS Gateway is extremely capable, but it is a full distributed storage platform. Unless you already run Ceph or have a dedicated storage team, it is too heavy for a typical web app or SaaS.

5. Managed S3-compatible storage

Sometimes the right answer is to stop self-hosting storage. Providers such as Cloudflare R2, Backblaze B2, Hetzner Object Storage or Wasabi give you an S3 endpoint for a low monthly price. You trade control for zero maintenance. For backups, I often recommend both: self-hosted for the app, plus an offsite managed bucket for disaster recovery.

How to choose in 60 seconds

  • One server, a few hundred GB, want it working today: RustFS.
  • Millions of files or multi-server growth: SeaweedFS.
  • Several small nodes in different locations: Garage.
  • No time to run storage at all: a managed S3-compatible provider.
  • Already running Ceph: Ceph RGW.

Step-by-step: migrating from MinIO without downtime

Step 1: Inventory what you have

List buckets, sizes, and which apps use which credentials. Check for bucket policies, lifecycle rules and public-read buckets, because these are the settings people forget to recreate.

Step 2: Start the new server next to the old one

Run RustFS (or your choice) on different ports or a different host. Create the same bucket names and a dedicated access key per application.

Step 3: Copy the data with rclone

rclone speaks S3 to both sides and can be re-run safely. Configure two remotes, then sync:

# ~/.config/rclone/rclone.conf
[old]
type = s3
provider = Minio
endpoint = http://127.0.0.1:9000
access_key_id = OLD_KEY
secret_access_key = OLD_SECRET

[new]
type = s3
provider = Other
endpoint = http://127.0.0.1:9100
access_key_id = NEW_KEY
secret_access_key = NEW_SECRET

# copy everything, then re-run right before the switch to catch new uploads
rclone sync old:uploads new:uploads --progress --checksum
rclone copies objects from the archived MinIO bucket to RustFS with the same keys MinIO archived RustFS new rclone sync --checksum same keys · same URLs
rclone copies every object with the same key, so your URLs never change. Run it again right before the switch to catch new uploads.

Step 4: Point the app at the new endpoint

In most SDKs the change is two environment variables. One setting matters for every MinIO-style server: path-style addressing. Here is the Node.js client config this website uses:

import { S3Client } from "@aws-sdk/client-s3";

const s3 = new S3Client({
  endpoint: process.env.S3_ENDPOINT,   // https://s3.yourdomain.com
  region: "us-east-1",                 // any value works for self-hosted
  forcePathStyle: true,                // http://host/<bucket>/<key>
  credentials: {
    accessKeyId: process.env.S3_ACCESS_KEY!,
    secretAccessKey: process.env.S3_SECRET_KEY!,
  },
});

Keep object keys identical and your public URLs never change. On this site, every upload is served through the API as /files/<key>, and if a key is not found in the bucket it falls back to local disk. That one fallback let me migrate gradually with zero broken images.

Step 5: Final sync, switch, watch

Run rclone sync one last time, deploy the new endpoint, and watch logs for 403 or 404 errors for a day. Keep the old MinIO data read-only for a week before deleting anything.

Don't forget backups

Moving storage is the perfect moment to fix backups. A bucket on the same disk as your app is not a backup. Schedule rclone sync to an offsite provider every night and test a restore. If you want a deeper walkthrough of server and database backups, read my complete guide to Linux backups.

Frequently asked questions

Can I keep using MinIO in 2026?

The software still runs, but the community repository is archived and no longer receives fixes. For internal test environments that is acceptable for a while. For anything exposed to the internet or holding customer data, plan a migration.

Is RustFS production ready?

RustFS has a stable 1.x release line and covers the core S3 API well. I run it in production for this website. As with any young project, pin a version, monitor it, and keep offsite backups.

Do I need to change my application code?

Usually not. If your app uses an AWS S3 SDK, you change the endpoint, credentials and possibly enable path-style addressing. Object keys and bucket names stay the same.

What is the cheapest way to get S3 storage?

For small projects, a self-hosted RustFS or Garage node on a VPS you already pay for costs nothing extra. For large or critical data, a managed S3-compatible provider is often cheaper than the engineering time to run storage yourself.

How long does a migration take?

For a typical web app with tens of gigabytes, a careful migration takes a few hours of work plus the copy time. Most of the effort is inventory and testing, not the copy itself.

Need help moving off MinIO?

I plan and run storage migrations, set up self-hosted S3 with TLS and backups, and make sure nothing breaks along the way. See my DevOps services or contact me with your current setup and I will reply with a clear plan and a fixed price. If you are also rethinking where your app runs, my comparison of Vercel vs self-hosting costs is a good next read.

  • MinIO alternative
  • RustFS
  • SeaweedFS
  • Garage S3
  • self-hosted S3
  • object storage
  • DevOps

Keep reading

Vercel vs Self-Hosting in 2026: Real Costs Compared
DevOpsOct 5, 2026

Vercel vs Self-Hosting in 2026: Real Costs Compared

Vercel is cheapest for one small app. With several apps, steady traffic or long-running jobs, a $10–40 VPS running Coolify, Dokploy or Kamal usually costs less. Every week I talk to founders and agencies who are surprised by a hosting bill. The app did not change much, but traffic grew, the team grew, or a few background jobs got added, and the platform invoice tripled. Other teams go the opposite way: they move to a cheap VPS, skip backups and monitoring, and pay for it later in downtime. This article compares the real cost of Vercel and self-hosting in 2026, including the hidden costs that pricing pages do not show. I run my own sites on a self-managed VPS and also help clients who are happy on Vercel, so this is not a sales pitch for either side. Key takeaways Vercel's real price is per seat plus usage. Pro plans are billed per team member, and bandwidth, function execution and build minutes above the included quota are charged on top. A VPS is a flat fee. Roughly $5–40 per month buys enough CPU and RAM to host many small apps, a database and a cache. Self-hosting adds work, not just savings: updates, backups, monitoring and security are now your job (or your DevOps partner's job). Open-source PaaS tools like Coolify and Dokploy give you a Vercel-style dashboard on your own server. The break-even point usually arrives when you have more than two or three production apps , a growing team, or workloads that do not fit serverless. How Vercel pricing really works Vercel's free Hobby plan is for personal, non-commercial projects. Commercial projects need Pro, which is priced per team member per month and includes a usage allowance. Beyond the allowance you pay for what you use: data transfer, serverless and edge function execution, image optimization, build minutes and some add-ons. Enterprise plans are custom-priced. This model is excellent when you are small. You pay almost nothing to start, and you get preview deployments, a global CDN and zero server maintenance. The bill grows with three things: Team size. Five developers cost five seats, even if only one person deploys. Traffic and media. Image-heavy sites and large downloads push bandwidth and optimization usage up. Server work. Heavy API routes, AI calls that wait on slow model responses, and frequent revalidation all add function time. Always check the current numbers on Vercel's pricing page; they change, and your usage dashboard is the only reliable forecast. What self-hosting costs The server A VPS from Hetzner, DigitalOcean, Vultr, Linode or Contabo with 2–4 vCPUs and 4–8 GB RAM costs roughly $5–40 per month depending on the provider and region. That single server can run several Next.js or Node.js apps, PostgreSQL, Redis and a reverse proxy. Bandwidth is usually included in generous amounts. The deployment layer Coolify: the most popular open-source, self-hosted PaaS. Git push deploys, preview deployments, databases and a polished dashboard. It needs some RAM for itself (plan on a 4 GB server or larger). Dokploy: a newer alternative with a similar Docker-based approach and a clean UI. Lighter and growing fast. Kamal: the CLI tool from 37signals (makers of Basecamp and HEY). No dashboard; it SSHes into your servers, deploys Docker images and switches traffic with zero downtime. Plain PM2 + Nginx + GitHub Actions: the leanest option with the fewest moving parts. This is what I use for this website. Full guide: deploy Next.js 16 on a VPS . The hidden costs This is where honest comparisons differ from marketing posts. When you self-host, you also take on: Security updates for the OS, runtime and database. Backups that you have actually tested restoring. Monitoring and alerts for uptime, disk space and memory. Incident time. When the server has a problem at 2 a.m., nobody else will fix it. Budget a few hours per month for this, or a monthly maintenance retainer with someone who does it for a living. Even with that included, multi-app teams usually come out ahead. Illustrative shape, not real prices: usage-based bills climb with seats and traffic, while a VPS stays flat until you outgrow it. Three realistic scenarios Scenario 1: Solo founder, one marketing site One developer, a Next.js landing page and blog, modest traffic. Winner: Vercel. You will likely stay inside the Pro allowance, and your time is better spent on the product than on servers. Scenario 2: Agency with 10 client sites Three developers, ten small production sites, each with light traffic. On a per-seat, per-project platform the bill adds up quickly. Two well-managed VPS servers with Coolify or a scripted PM2 setup can host all ten for a flat monthly fee. Winner: self-hosting , often by a wide margin. Scenario 3: SaaS with background jobs and websockets A product with a NestJS API, scheduled jobs, a queue worker and real-time chat. Serverless functions are not designed for long-running processes or persistent websocket connections, so you would need extra services anyway. Winner: self-hosting or a hybrid , where the frontend stays on Vercel and the API, workers and database run on a VPS. A simple decision framework Stay on Vercel if most of these are true: You have one or two apps and a small team. Preview URLs for every pull request are central to your workflow. Your backend is light, or lives elsewhere already. Nobody on the team wants to own servers. Move to self-hosting (or hybrid) if most of these are true: Your monthly platform bill is growing faster than your revenue. You run long tasks, workers, cron jobs, websockets or self-hosted AI models. You need data to stay in a specific country or on hardware you control. You host many small sites for clients. How to migrate without drama Audit Vercel-specific features you rely on: edge middleware, image optimization, cron, KV or Blob storage, analytics. Pick replacements: Next.js middleware and image optimization run fine on next start ; cron becomes systemd timers or a worker; Blob storage becomes S3-compatible storage (see my guide to self-hosted S3 after MinIO ). Build a CI/CD pipeline with automatic rollback so deploys stay boring. Here is the pipeline I use . Harden the server before DNS points at it. Lower DNS TTL , switch, watch logs, and keep the Vercel project for a week as a fallback. Frequently asked questions What is the best Vercel alternative in 2026? For a self-hosted dashboard experience, Coolify is the most popular choice, with Dokploy close behind. For CLI-driven teams, Kamal is excellent. For the simplest setup on one server, PM2 with Nginx and a deploy script is hard to beat. Is a VPS fast enough compared with a CDN? For most audiences, yes, especially with static assets cached for a long time. If your users are spread worldwide, put a CDN like Cloudflare in front of the VPS and you get global caching for free or at low cost. Can I self-host Next.js with all features? Yes. Server components, server actions, ISR, middleware and image optimization all work with next start . Some multi-instance caching needs extra configuration. How much time does self-hosting take each month? With automated updates, backups and monitoring in place, a few hours per month for a small fleet. Without automation it can be much more, which is why setup quality matters. Can I use both Vercel and a VPS? Absolutely. A hybrid setup is common: the marketing site and frontend on Vercel, the API, database and workers on a VPS. Get a hosting cost review Send me your current hosting bill and a short description of your stack, and I will tell you honestly whether moving makes sense, what it would cost, and what the risks are. I handle the migration, CI/CD, hardening and ongoing maintenance. See my DevOps services or contact me .

Read article →
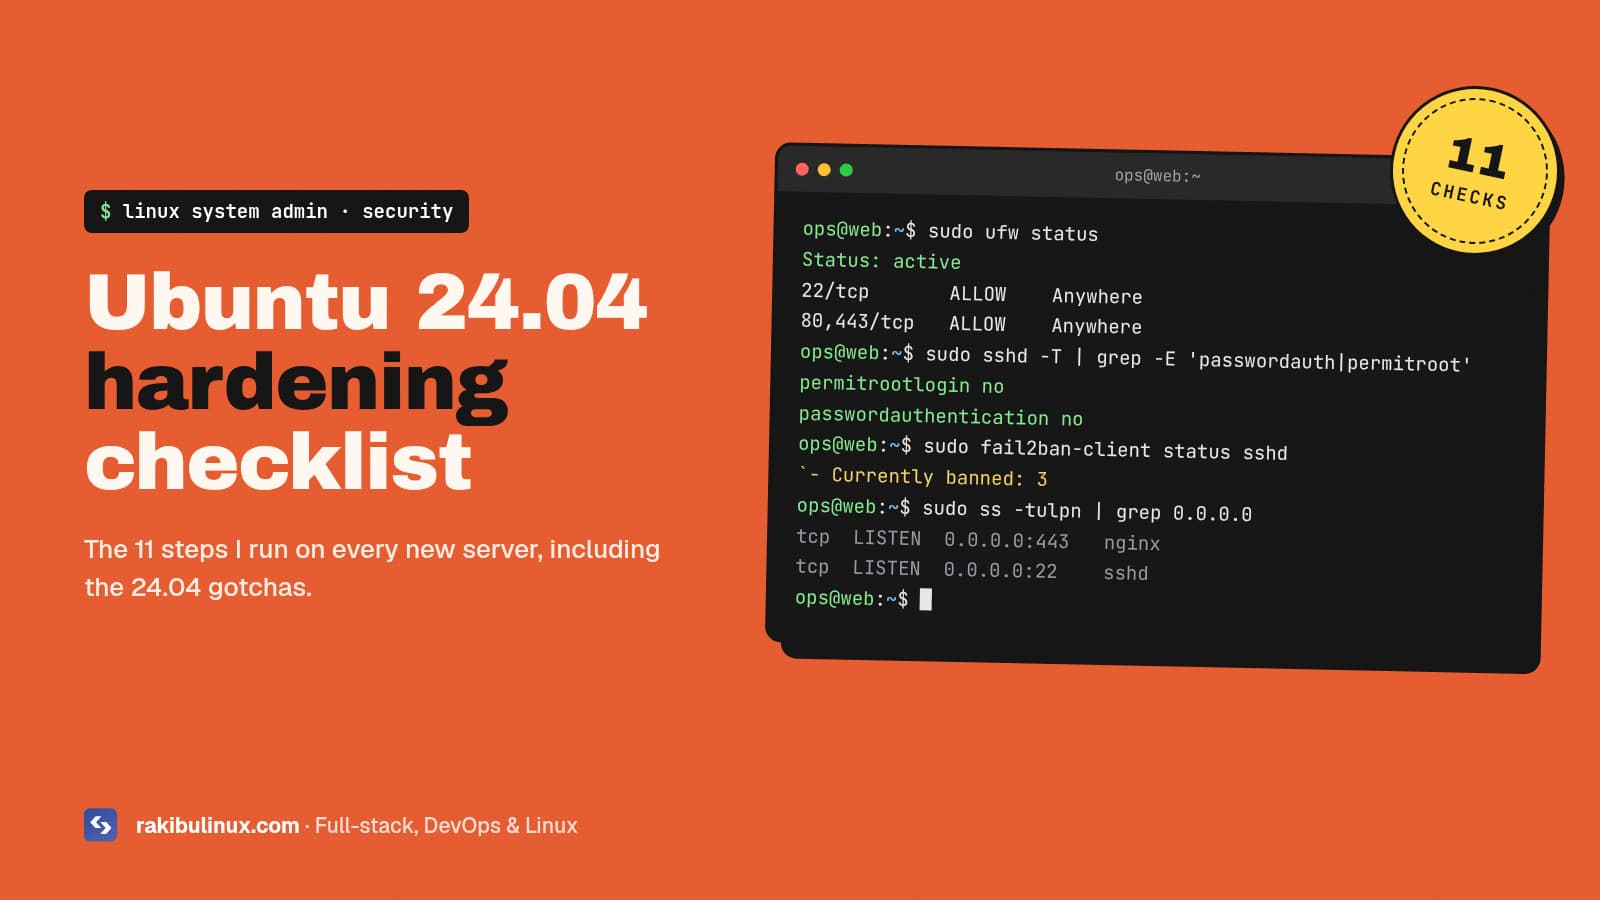
Ubuntu 24.04 Server Hardening Checklist for 2026
Linux System AdminOct 5, 2026

Ubuntu 24.04 Server Hardening Checklist for 2026

Harden Ubuntu 24.04 with automatic security updates, SSH keys only, no root login, a UFW firewall, fail2ban, and offsite backups you have actually tested. A fresh VPS gets its first automated login attempts within minutes of going online. Bots scan the whole internet for open SSH ports, default passwords and outdated software all day long. The good news is that a small set of well-chosen settings stops almost all of it. This is the checklist I apply to every Ubuntu 24.04 LTS server I set up for clients, in the order I apply it, with the commands and the gotchas that are specific to 24.04. Key takeaways Patch automatically. Most real-world compromises use known, already-fixed vulnerabilities. SSH keys only, no root login. On 24.04, put your settings in /etc/ssh/sshd_config.d/ and watch out for the cloud-init file that can re-enable passwords. Default-deny firewall with UFW, and remember that Docker-published ports bypass UFW. fail2ban slows down brute-force attempts and keeps logs clean. Backups you have restored at least once are part of security, not a separate topic. 1. Update everything and enable automatic security updates sudo apt update && sudo apt full-upgrade -y sudo apt install -y unattended-upgrades sudo dpkg-reconfigure -plow unattended-upgrades Ubuntu installs security updates automatically once this is enabled. Kernel updates still need a reboot. Either schedule one in /etc/apt/apt.conf.d/50unattended-upgrades : Unattended-Upgrade::Automatic-Reboot "true"; Unattended-Upgrade::Automatic-Reboot-Time "04:00"; or enable Livepatch through Ubuntu Pro (free for personal use on a small number of machines) to apply many kernel fixes without rebooting. 2. Create a non-root user with sudo sudo adduser deploy sudo usermod -aG sudo deploy # copy your public key sudo mkdir -p /home/deploy/.ssh sudo cp ~/.ssh/authorized_keys /home/deploy/.ssh/ sudo chown -R deploy:deploy /home/deploy/.ssh sudo chmod 700 /home/deploy/.ssh && sudo chmod 600 /home/deploy/.ssh/authorized_keys Open a second terminal and confirm you can log in as the new user and run sudo before you change any SSH settings. Keep your current session open until everything works. 3. Harden SSH (the 24.04 way) Ubuntu 24.04 reads drop-in files from /etc/ssh/sshd_config.d/ . Two details trip people up: The first value wins. OpenSSH uses the first value it reads for each setting, and drop-ins are read in alphabetical order before the main file. Cloud images often ship 50-cloud-init.conf with PasswordAuthentication yes . If your file sorts after it, your setting is ignored. So name your file so it sorts first: # /etc/ssh/sshd_config.d/00-hardening.conf PermitRootLogin no PasswordAuthentication no KbdInteractiveAuthentication no PubkeyAuthentication yes AllowUsers deploy MaxAuthTries 3 LoginGraceTime 30 X11Forwarding no sudo sshd -t # syntax check, no output means OK sudo sshd -T | grep -E 'passwordauthentication|permitrootlogin' sudo systemctl restart ssh The sshd -T line prints the effective configuration, so you can see that passwords are really off. Another 24.04 detail: SSH is socket-activated . If you change the port, the listening port comes from ssh.socket , so run sudo systemctl daemon-reload && sudo systemctl restart ssh.socket afterwards. Changing the port reduces log noise but is not real security on its own; keys-only login is what matters. 4. Turn on the firewall (UFW) sudo ufw default deny incoming sudo ufw default allow outgoing sudo ufw allow OpenSSH sudo ufw allow 80,443/tcp sudo ufw enable sudo ufw status verbose Allow SSH before enabling UFW, or you will lock yourself out. If you have a static office IP, restrict SSH to it: sudo ufw allow from 203.0.113.10 to any port 22 proto tcp . Docker warning: ports published with -p 5432:5432 are opened through iptables rules that UFW does not control. Bind internal services to localhost instead ( -p 127.0.0.1:5432:5432 ) and let Nginx be the only public entry point. I see exposed databases caused by this on client servers more often than any other issue. Default deny: only SSH, HTTP and HTTPS reach the server. MySQL, Redis and Postgres stop at the firewall. Remember that Docker-published ports skip UFW. 5. Install fail2ban sudo apt install -y fail2ban sudo tee /etc/fail2ban/jail.local >/dev/null <<'EOF' [DEFAULT] bantime = 1h findtime = 10m maxretry = 5 backend = systemd [sshd] enabled = true EOF sudo systemctl enable --now fail2ban sudo fail2ban-client status sshd With password login disabled, attackers cannot guess their way in anyway, but fail2ban cuts the noise and protects other services you add later, such as Nginx basic-auth or mail. 6. Check what is listening sudo ss -tulpn Every line should be something you expect. Databases, Redis, app servers on ports like 3000 or 5000, and admin panels should listen on 127.0.0.1 , not 0.0.0.0 . Remove packages you do not use with sudo apt purge . 7. Secure the web layer Use HTTPS everywhere with Let's Encrypt ( certbot --nginx ) and redirect HTTP to HTTPS. Hide version numbers in Nginx with server_tokens off; . Add security headers: Strict-Transport-Security , X-Content-Type-Options: nosniff , Referrer-Policy and a sensible Content-Security-Policy . Never expose .env , .git or backup files from the web root. Running Next.js or Node.js behind Nginx? My guide to deploying Next.js 16 on a VPS shows the full reverse proxy config. 8. Kernel and system settings Ubuntu's defaults are already reasonable, and AppArmor is enabled out of the box. A few extra network settings are worth adding in /etc/sysctl.d/99-hardening.conf : net.ipv4.conf.all.rp_filter = 1 net.ipv4.conf.all.accept_redirects = 0 net.ipv6.conf.all.accept_redirects = 0 net.ipv4.conf.all.send_redirects = 0 net.ipv4.conf.all.accept_source_route = 0 net.ipv4.tcp_syncookies = 1 sudo sysctl --system 9. Logs, monitoring and alerts Keep journald logs persistent and review journalctl -u ssh once in a while. Set up uptime monitoring and disk-space alerts; a full disk causes more outages than hackers do. Run sudo apt install lynis && sudo lynis audit system for a free security score and a list of suggestions. 10. Backups you have actually tested Security is also about recovery. Back up databases and important files every day to a different provider or region, keep several versions, and do a test restore at least once per quarter. My complete guide to Linux backups covers scripts for files and databases, and if you store backups in self-hosted S3, read my notes on MinIO alternatives . The quick checklist Full upgrade and unattended security updates Non-root sudo user with SSH key SSH: keys only, no root, drop-in sorted first, verified with sshd -T UFW default deny, only 22, 80, 443 open Docker ports bound to 127.0.0.1 fail2ban with the sshd jail ss -tulpn shows only expected services HTTPS, security headers, server_tokens off sysctl network hardening Monitoring, alerts and a Lynis audit Offsite backups with a tested restore Frequently asked questions Is Ubuntu 24.04 secure by default? It is a solid base: AppArmor is enabled, packages are signed and security updates are fast. But a fresh server still allows password SSH on many cloud images, has no firewall rules and does not reboot for kernel updates. The steps above close those gaps. Should I change the SSH port? It reduces log noise from bots but does not stop a targeted attacker. Disabling passwords and root login matters far more. If you change it, update UFW and restart ssh.socket on 24.04. Do I need fail2ban if passwords are disabled? It is not strictly required for SSH once passwords are off, but it is cheap, reduces noise, and protects other services you may expose later. How often should I audit a server? Review updates and alerts weekly (automatically if possible), and do a full audit with Lynis and a manual check of open ports every quarter or after any big change. Can you harden my existing server without downtime? Usually yes. Most steps apply live. SSH and firewall changes are done carefully with a second session open, and a kernel reboot is scheduled in a quiet window. Get your server hardened I secure and maintain Ubuntu and Debian servers for businesses: hardening, firewalls, backups, monitoring, and a short written report of everything I changed. See my Linux system admin services or contact me for a security check of your server. Shipping code to that server next? Read GitHub Actions CI/CD with automatic rollback .

Read article →
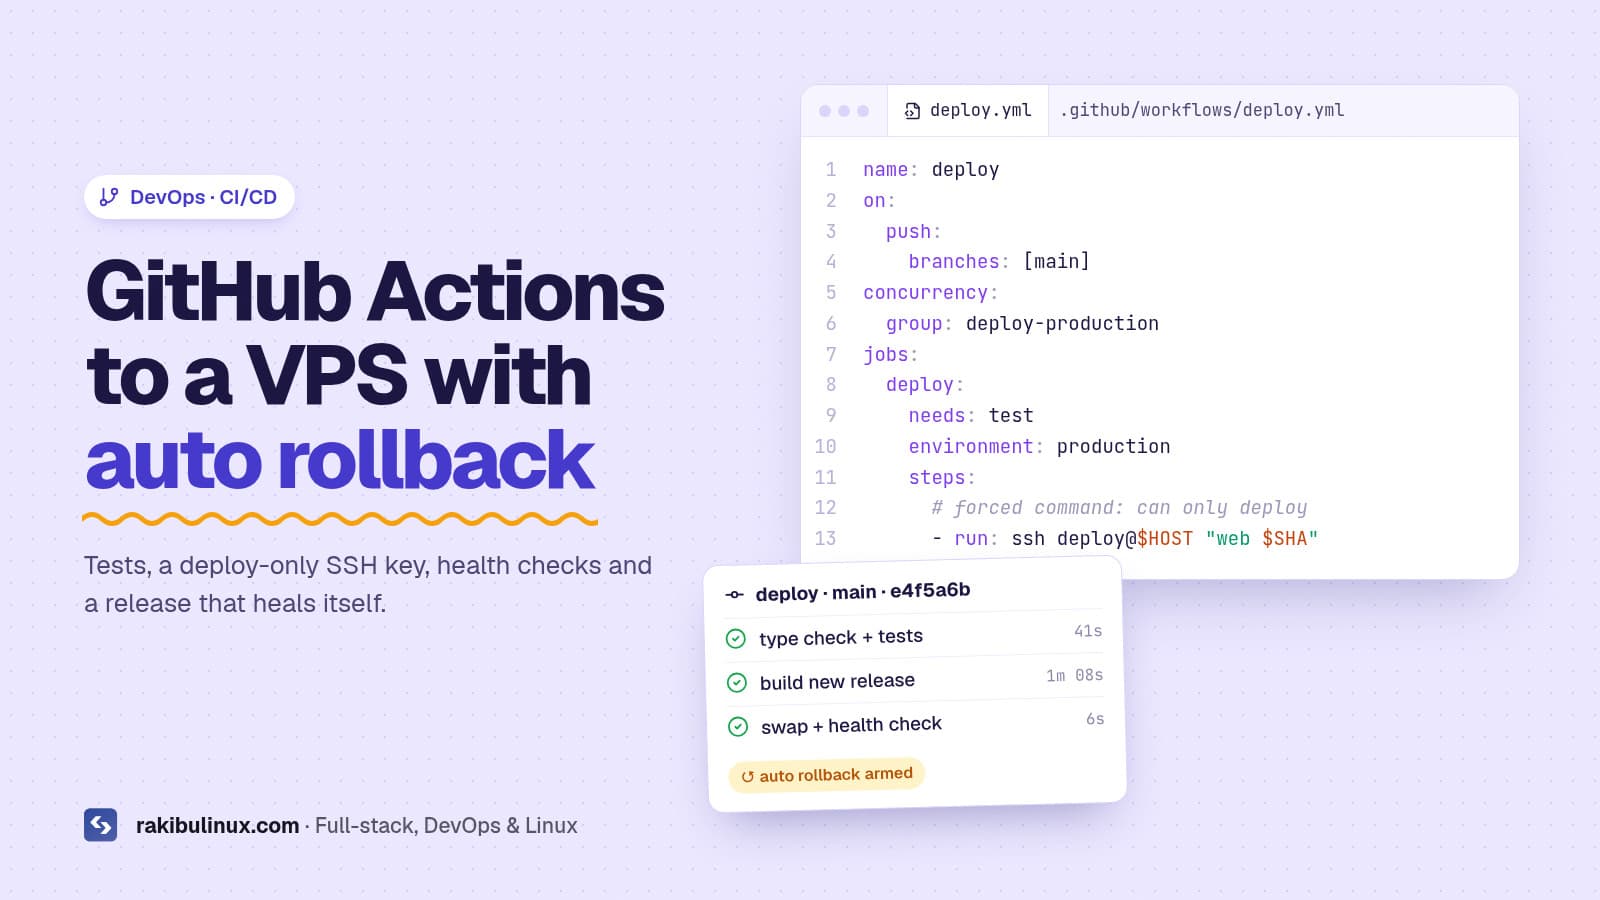
GitHub Actions CI/CD to a VPS with Automatic Rollback
DevOpsOct 5, 2026

GitHub Actions CI/CD to a VPS with Automatic Rollback

Safe GitHub Actions deploys to a VPS: run tests, SSH in with a deploy-only key, build a fresh release, health-check it and roll back automatically on failure. Most "deploy to VPS with GitHub Actions" tutorials stop at ssh server "git pull && npm run build && pm2 restart" . That works until the day the build fails halfway and your site goes down, or a leaked CI secret gives someone a root shell on your server. In this guide I show the pipeline that deploys this website and its API: every push to main goes live in a few minutes, a broken release rolls itself back, and the CI key cannot do anything except deploy. Key takeaways Never build in the live folder. Build each release in a new directory and switch a symlink only after it succeeds. Restrict the deploy key with a forced command in authorized_keys , so the CI secret can only trigger a deploy. Health-check after every switch and roll back automatically on failure. Back up the database before migrations. Code rolls back in seconds; data does not. Use a concurrency group so two pushes never deploy at the same time. The architecture You push to main . GitHub Actions installs dependencies, runs the type check and tests. If they pass, the workflow SSHes to the server with a dedicated deploy key and sends only the commit SHA. The server's deploy script builds that commit in a fresh release folder, backs up the database, runs migrations, switches the current symlink and reloads PM2. A health check calls the app. If it fails, the symlink goes back to the previous release and the script exits with an error, which turns the GitHub run red. The heavy logic lives on the server in one script, not in YAML. That makes the pipeline easy to test by hand and easy to reuse for several apps. Each stage must pass before the next one runs. If the health check fails, the symlink goes back to the previous release automatically. Step 1: Create a locked-down deploy key Generate a key pair just for CI (no passphrase, since Actions runs unattended): ssh-keygen -t ed25519 -f deploy_key -N "" -C "github-actions-deploy" On the server, add the public key to the deploy user's ~/.ssh/authorized_keys with a forced command and every extra capability turned off: command="/usr/local/bin/deploy-gate",restrict ssh-ed25519 AAAA...your-key... github-actions-deploy Whatever command the client asks for, SSH runs deploy-gate instead and puts the requested command in $SSH_ORIGINAL_COMMAND . The gate validates it strictly: #!/usr/bin/env bash # /usr/local/bin/deploy-gate: the only thing the CI key can run set -euo pipefail read -r app sha extra <<< "${SSH_ORIGINAL_COMMAND:-}" [[ "$app" =~ ^(web|api)$ ]] || { echo "bad app"; exit 1; } [[ "$sha" =~ ^[0-9a-f]{40}$ ]] || { echo "bad sha"; exit 1; } [[ -z "${extra:-}" ]] || { echo "unexpected args"; exit 1; } exec /usr/local/bin/app-deploy "$app" "$sha" If this key ever leaks, the worst an attacker can do is redeploy a commit that already exists in your repository. That is a huge improvement over a key with a full shell. Step 2: Add the secrets to GitHub In your repository go to Settings → Secrets and variables → Actions and add: DEPLOY_KEY : the private key file contents. DEPLOY_HOST : the server IP or hostname. DEPLOY_KNOWN_HOSTS : the output of ssh-keyscan your-server , so the runner verifies the server's identity instead of trusting the first key it sees. Step 3: The workflow file # .github/workflows/deploy.yml name: deploy on: push: branches: [main] workflow_dispatch: concurrency: group: deploy-production cancel-in-progress: false jobs: test: runs-on: ubuntu-latest steps: - uses: actions/checkout@v4 - uses: actions/setup-node@v4 with: { node-version: lts/*, cache: npm } - run: npm ci - run: npx tsc --noEmit - run: npm test --if-present deploy: needs: test runs-on: ubuntu-latest environment: production steps: - name: Deploy run: | install -m 700 -d ~/.ssh echo "${{ secrets.DEPLOY_KEY }}" > ~/.ssh/id_ed25519 echo "${{ secrets.DEPLOY_KNOWN_HOSTS }}" > ~/.ssh/known_hosts chmod 600 ~/.ssh/id_ed25519 ssh deploy@${{ secrets.DEPLOY_HOST }} "web ${{ github.sha }}" The environment: production line lets you add required reviewers or a wait timer in GitHub later, without touching the workflow. The concurrency block queues deploys instead of running them in parallel. Step 4: The server-side deploy script This is a trimmed version of the script that deploys my API. The web app version is the same without the database steps. #!/usr/bin/env bash # /usr/local/bin/app-deploy <app> <sha> set -euo pipefail APP=$1 SHA=$2 BASE=/srv/myproject/$APP REL=$BASE/releases/$(date +%Y%m%d%H%M%S)-${SHA:0:7} PREV=$(readlink -f "$BASE/current" || true) exec >> /var/log/app-deploy/$APP-$(date +%F).log 2>&1 git -C "$BASE/repo.git" fetch --quiet origin main git --git-dir="$BASE/repo.git" worktree add --detach "$REL" "$SHA" ln -s "$BASE/shared/.env" "$REL/.env" cd "$REL" && npm ci && npm run build if [[ $APP == api ]]; then set -a; . "$BASE/shared/.env"; set +a # loads DATABASE_URL pg_dump "$DATABASE_URL" | gzip > "$BASE/shared/db-backups/$(date +%F-%H%M)-${SHA:0:7}.sql.gz" npx prisma migrate deploy fi ln -sfn "$REL" "$BASE/current" pm2 reload "$APP" --update-env for i in {1..10}; do curl -fsS --max-time 5 "http://127.0.0.1:$(cat $BASE/shared/port)/health" >/dev/null && ok=1 && break sleep 3 done if [[ -z "${ok:-}" ]]; then echo "health check failed for $SHA, rolling back to $PREV" [[ -n "$PREV" ]] && ln -sfn "$PREV" "$BASE/current" && pm2 reload "$APP" --update-env exit 1 fi # keep the newest 5 releases and 30 database backups ls -1dt "$BASE"/releases/* | tail -n +6 | xargs -r rm -rf git --git-dir="$BASE/repo.git" worktree prune ls -1t "$BASE"/shared/db-backups/* | tail -n +31 | xargs -r rm -f echo "deployed $APP $SHA" Why database rollbacks need special care Rolling back code is instant. Rolling back a database migration is not, because new data may already have been written. Two rules keep this safe: Write backward-compatible migrations. Add columns and tables first, deploy code that uses them, and remove old columns in a later release (the expand-and-contract pattern). Then the previous release still works against the new schema, and the automatic rollback is safe. Back up before every migration. The pg_dump step above gives you a restore point tied to the exact commit. Step 5: Add a real health endpoint Checking that the homepage returns 200 is a good start. A better check is a small /health route that confirms the database connection and any critical dependency, returns quickly, and never requires authentication. In NestJS the @nestjs/terminus package makes this easy; in Next.js a simple route handler is enough. Common mistakes I fix for clients Building on the live folder , so a failed npm install takes the site down. Using the root SSH key in CI , giving every workflow full control of the server. Skipping host key verification with StrictHostKeyChecking=no . No concurrency control , so two quick pushes race and leave a half-deployed state. Secrets in the repository instead of a shared env file on the server or GitHub secrets. No logs , so nobody knows why last night's deploy failed. Frequently asked questions Is GitHub Actions free for deployments? Public repositories get free minutes on standard runners, and private repositories get a monthly free allowance depending on your plan. A pipeline like this uses only a few minutes per deploy because the build runs on your server. Should the build run in GitHub Actions or on the server? Both work. Building on the server keeps the workflow simple and avoids copying large artifacts. Building in CI (or producing a Docker image) keeps the server lighter. For small and medium apps, building on the server with a separate release folder is a solid choice. How do I deploy to multiple servers? Run the same deploy command against each host in a matrix job, or switch to a tool like Kamal that handles multi-server rolling deploys for you. How do I roll back manually? Re-run the workflow for an older commit, or SSH in and point the current symlink at the previous release, then reload PM2. Is this approach secure enough for production? With a restricted deploy key, verified host keys, secrets outside the repo and a hardened server, yes. Pair it with my Ubuntu server hardening checklist . Want a pipeline like this? I build CI/CD pipelines for Next.js, Node.js and NestJS apps with tests, safe migrations, health checks and automatic rollback, and I document everything so your team can own it. Start with my guide to deploying Next.js 16 on a VPS , check my DevOps services , or get in touch .

Read article →